It’s hard to keep this site updated especially since the last few months have been a whirlwind of activity, for which I am incredibly grateful. The summer brought shows in Texas, Iowa, Kansas, Missouri, Nebraska, Chicago, Quebec, and Ontario with Laura Rain & The Caesars as well as the Ottawa Blues Festival with Thornetta Davis. organissimo played several festivals in Michigan including the unCaged Festival in Northport and the Shoreline Jazz Festival in Muskegon. We also released and new CD in September called Live At The SpeakEZ (that’s two new organissimo CDs in 2017). This fall I was in Belgium for a few short days for two shows with Big Apple Blues and we’re finishing up a new record with that group as well. And I did a handful of other recording, mixing and mastering sessions as well.
On the gear front, I am proud to announce an endorsement with Kurzweil Music Systems and Weisersound. I am using a Kurzweil Forte 7 on stage and in the studio and I absolutely love it. It is an extremely beautiful keyboard, built like a tank, with an easy to use interface, great sounds, lots of room for your own sounds and samples, and more. Here are a couple of demo videos I made, the second one featuring THEO drummer Kevin DePree.
Contact David Weiser at Weisersound for your Forte and get VIP support, free custom patches, and the best customer service on the planet. He’s a personal friend and a great person.
Also, I am now the proud owner of the new flagship from Hammond Organ USA, the Hammond XK5. I will be with Hammond in their booth at the 2018 Winter NAMM show in January demonstrating the XK5 and all it can do. I plan on making a custom tonewheel set for it, as I’ve done with previous Hammond models. And expect some video demos as well in the near future. Here’s a brief live-stream I did on Facebook on the day I received the XK5 last week. The sound quality of FB live-streams isn’t so great, but you can get a feel of how it sounds. That’s the internal digital Leslie simulator, by the way.
This winter I will be heading to NYC for some recording sessions but mostly staying in Michigan, working on the upcoming sophomore THEO album, another Jim Alfredson’s Dirty Fingers album, and the album that Lawrence Barris and I did with the legendary drummer Harvey Mason (Herbie Hancock, Bob James, George Benson, etc). Speaking of Mr. Mason, we are performing with him on December 11th at the Wealthy Theatre in Grand Rapids, MI.
My event calendar is updated through December so you can see where I’ll be if you want to make a show. Happy Holidays and be safe this season!
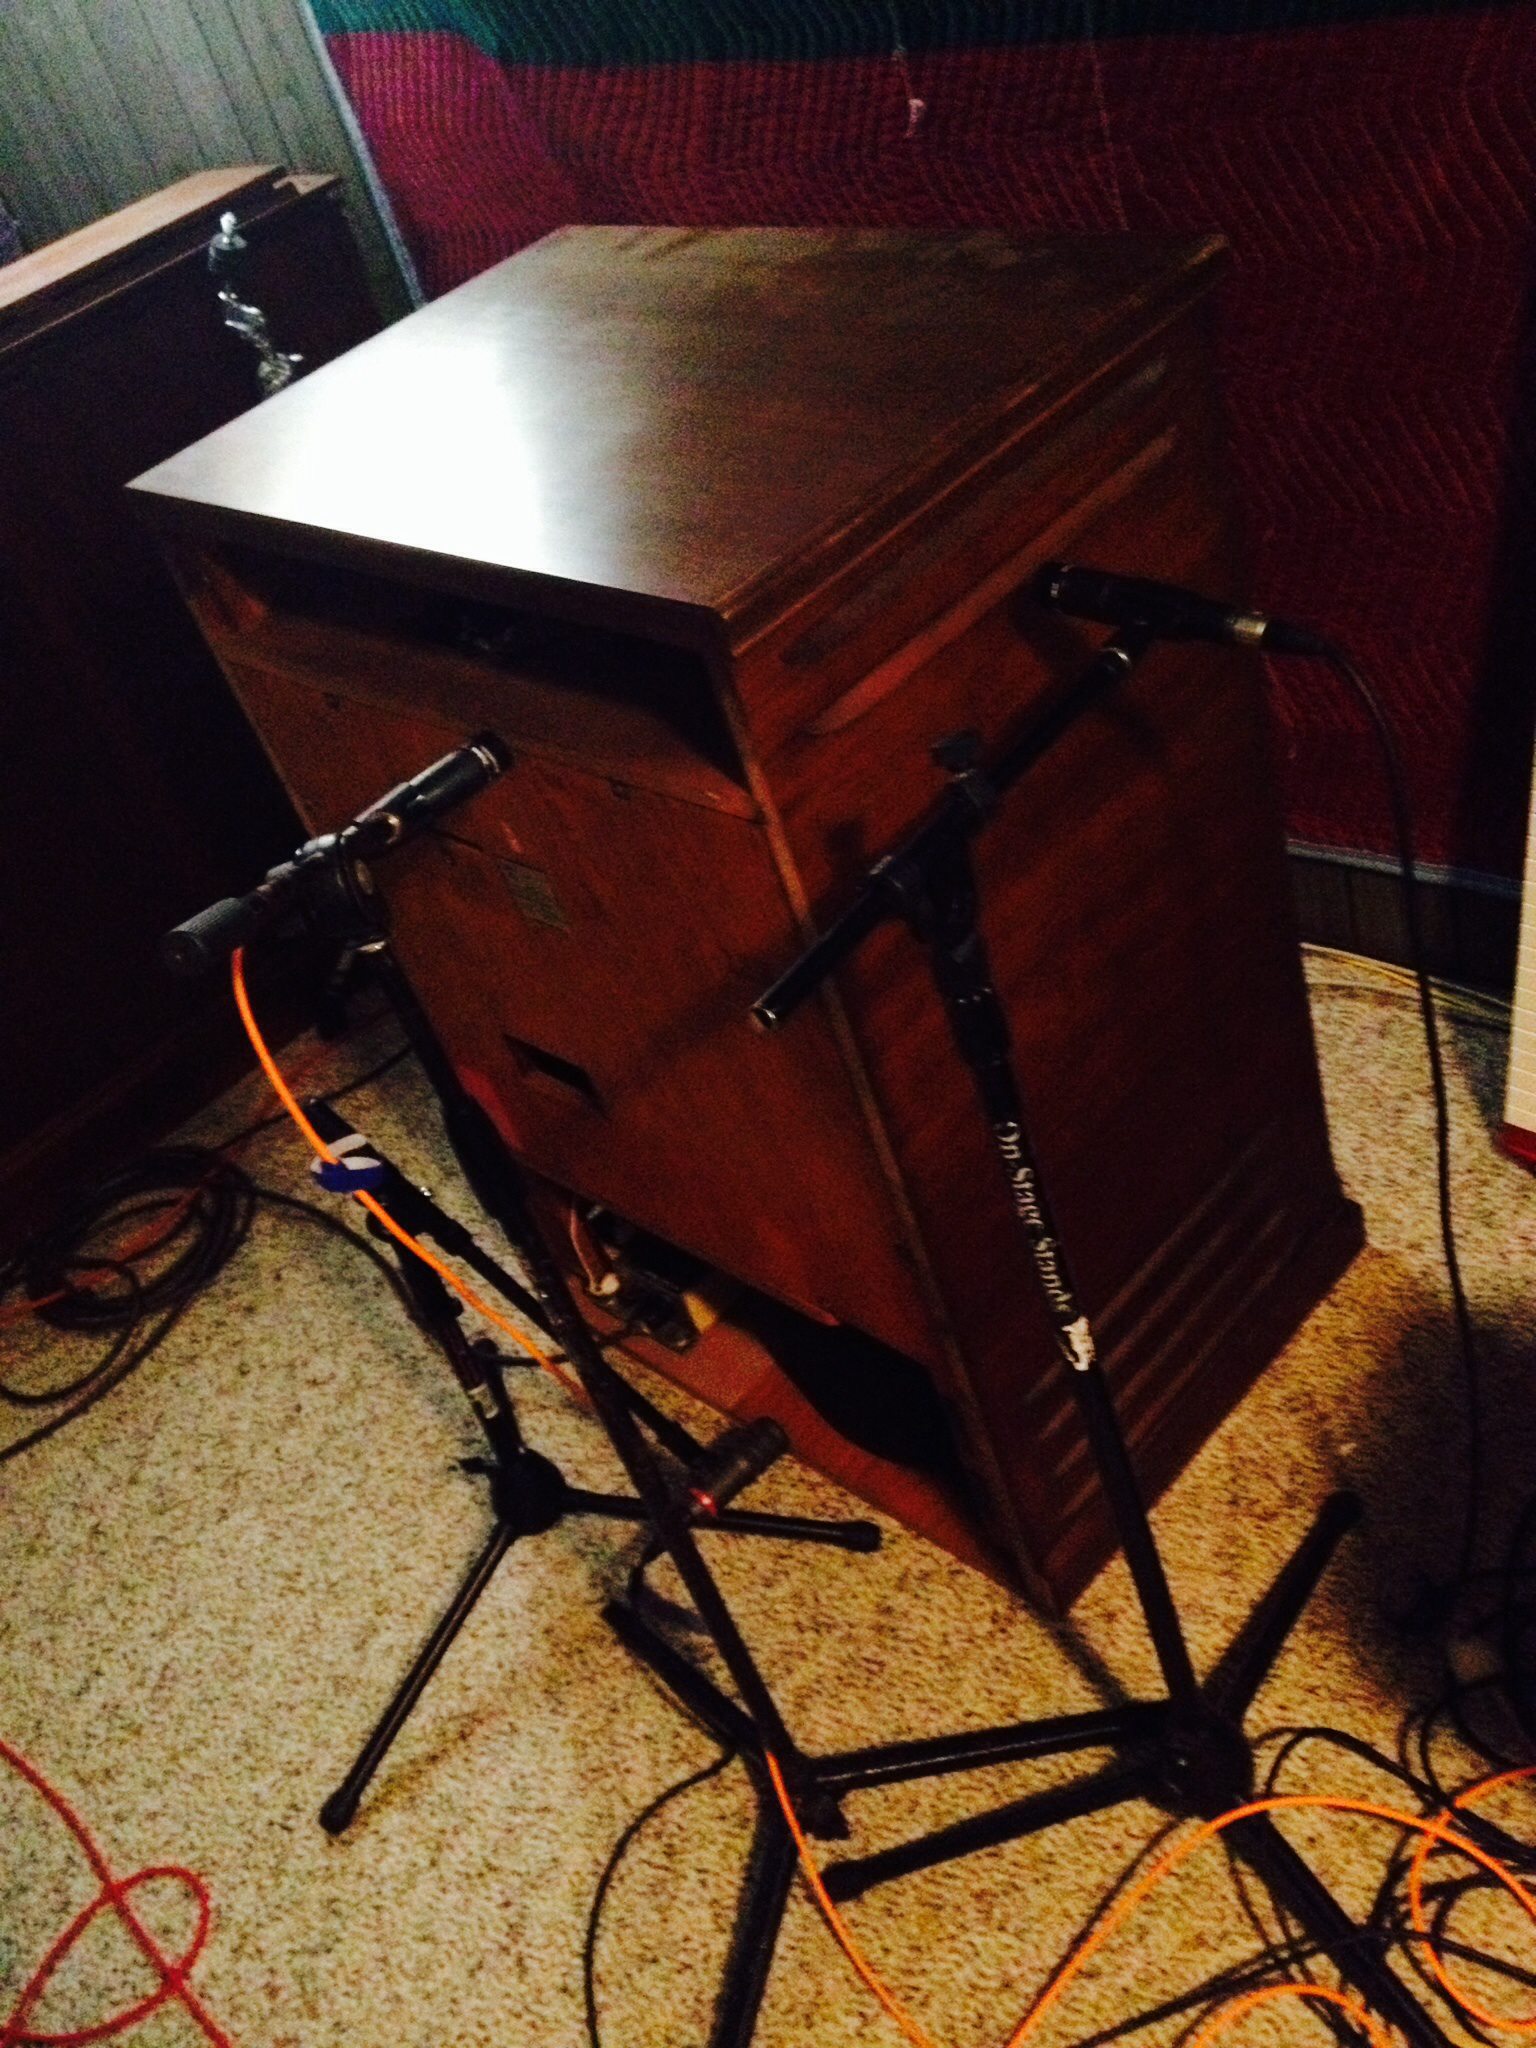
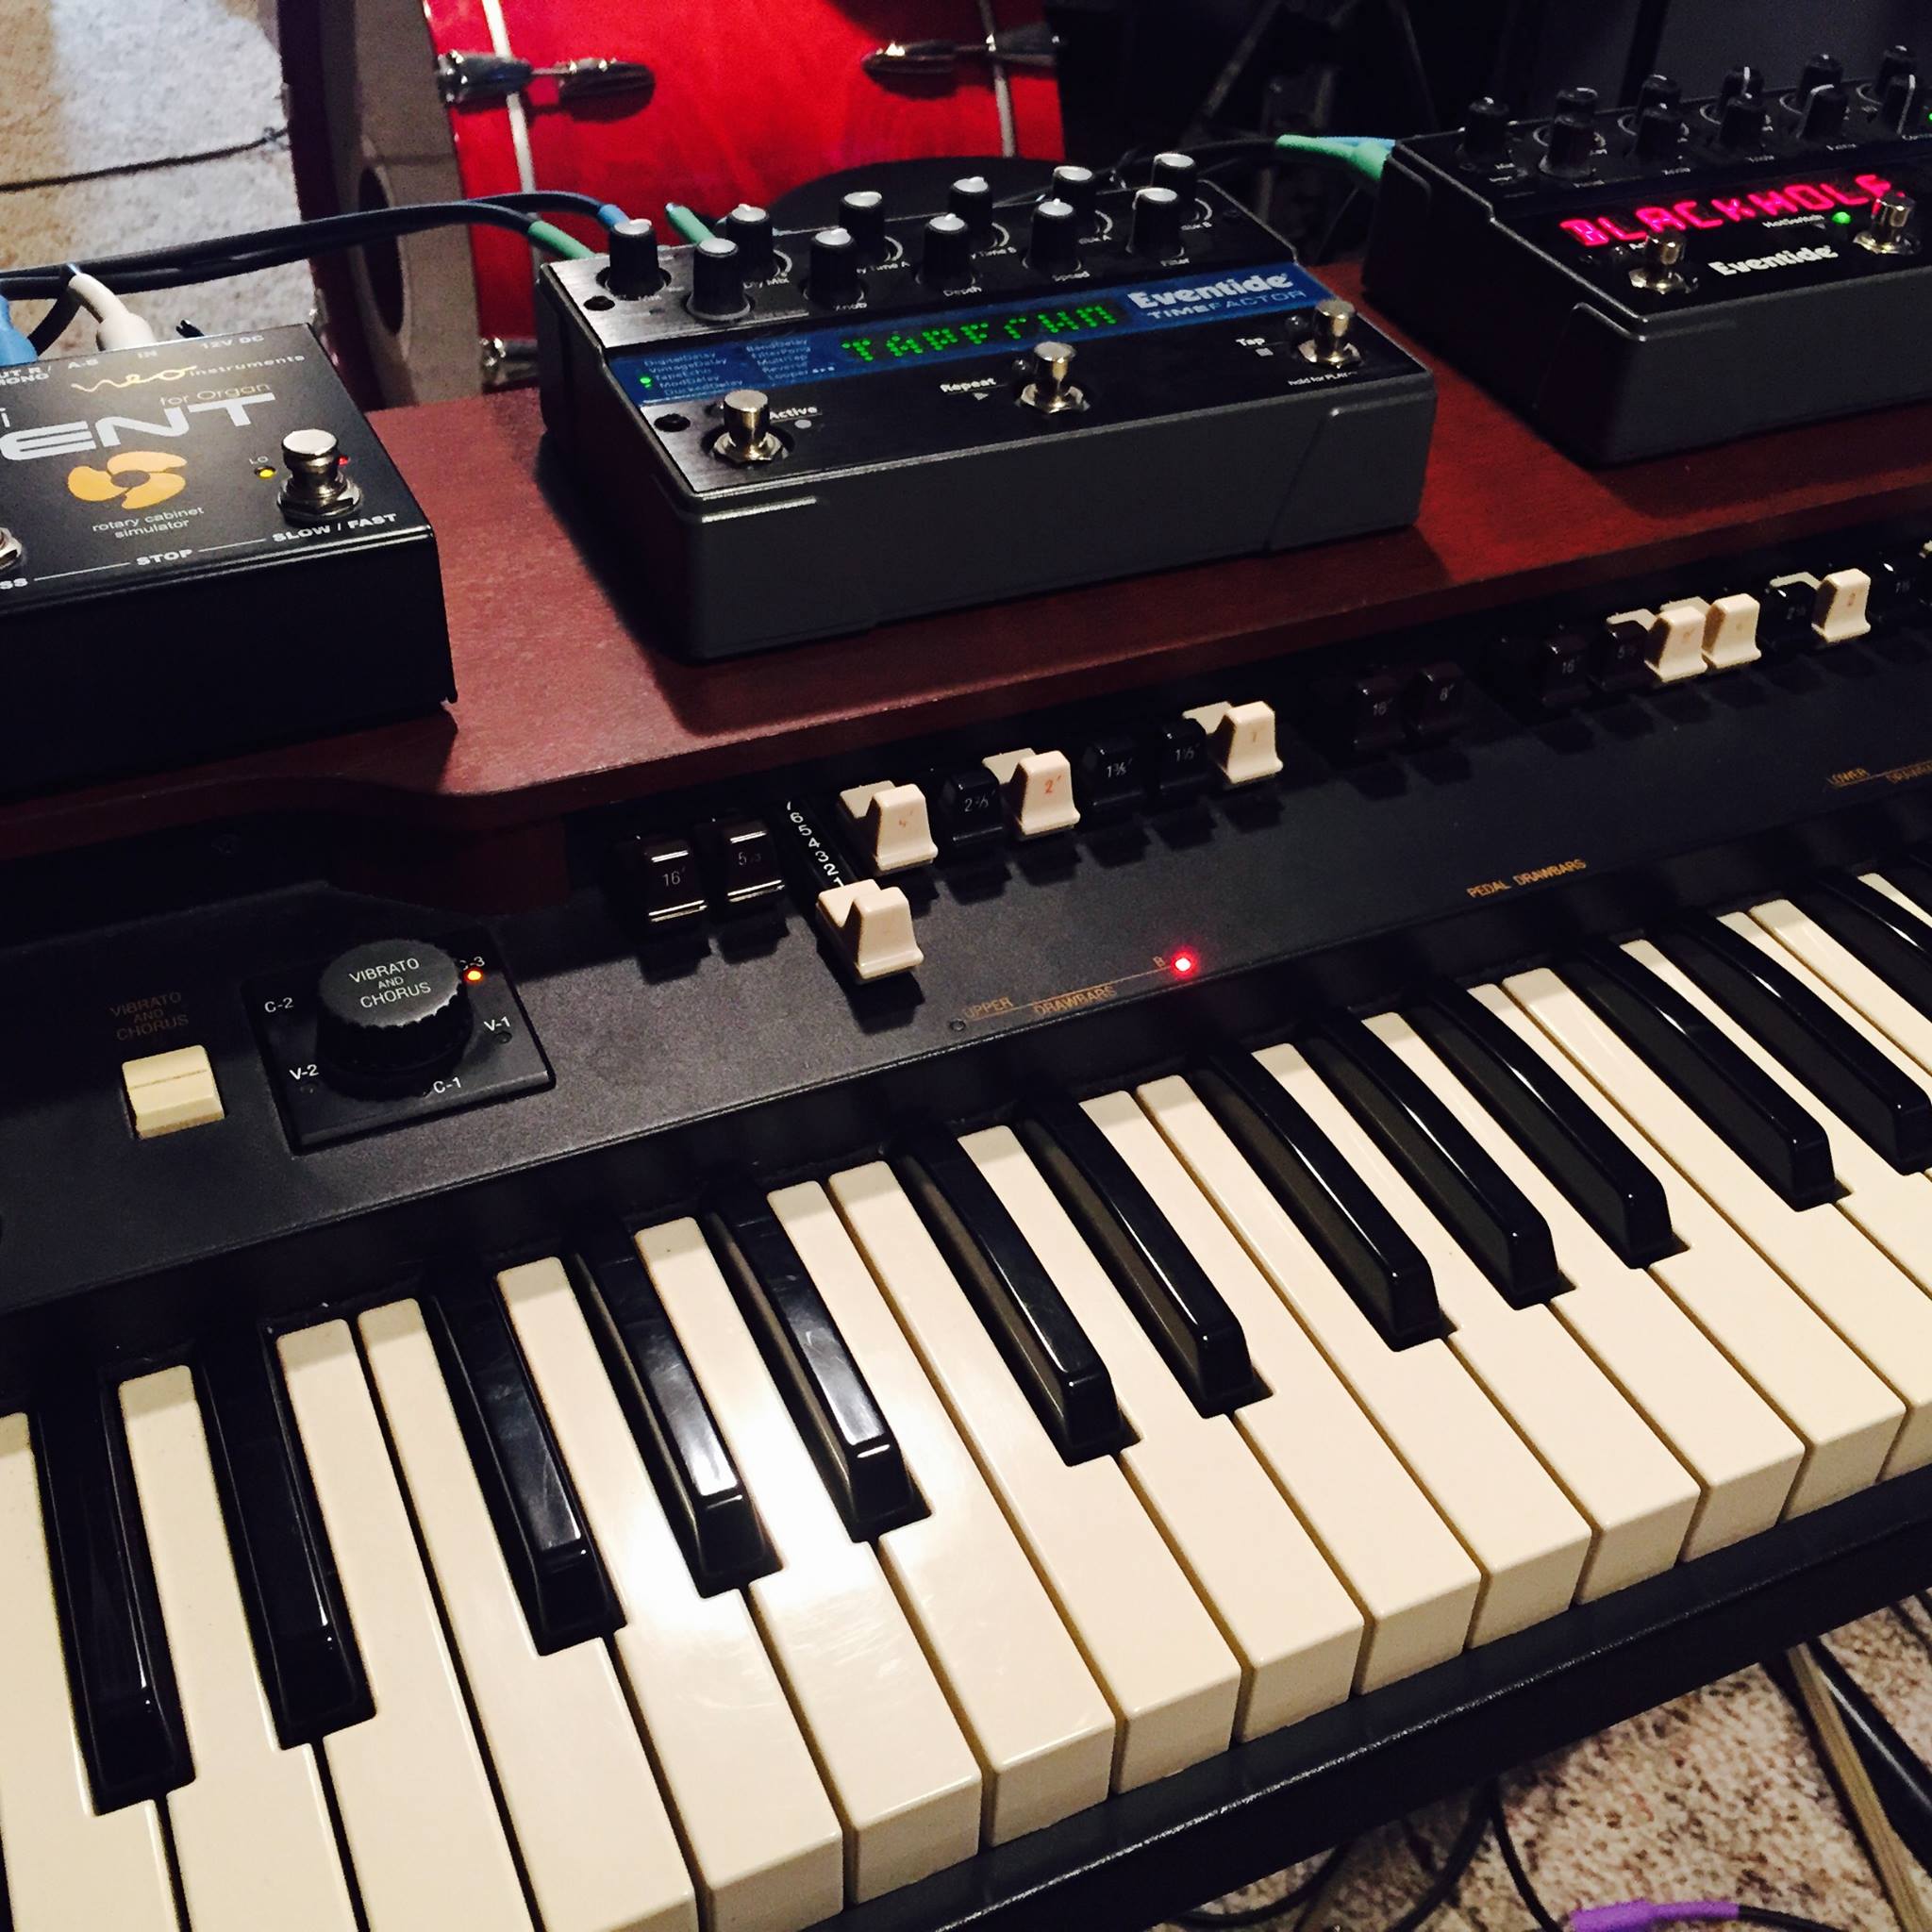
Yesterday I posted a video demo of the Mini Vent II using the venerable Hammond XK3 as the sound source. Today I connected the Mini Vent II to my 1954 Hammond C2.
The output of the Hammond C2 was connected to a small Yamaha mixer via a custom made direct box that converts the raw output from the C2’s preamp to a mic level signal. This mixer then fed the mono input of the Mini Vent II. The stereo output of the Mini Vent II was then fed into my DAW (Cubase 9) via a Yamaha N12 digital mixer. I added a bit of room reverb from the Valhalla Room Reverb just so the Mini Vent II didn’t sound so dry. A real Leslie in a room, after all, would have some ambiance in the sound.
As a child growing up in the 80s, I was unfamiliar with the sound of the Wurlitzer electric piano until my late teens. Radio at the time was inundated with the now maligned DX7 electric piano sound. I knew how a Rhodes sounded because my dad had one of the space-age looking green student models for awhile. But I really didn’t know what a Wurlitzer electric piano was nor did I know what it sounded like until I dug into the early Ray Charles catalog as a 17 year old. It just so happened that the Wurlitzer began making a bit of a comeback about that same time thanks to Beck’s song Loser and Sheryl Crow’s All I Wanna Do topping the charts. Over the next few years, the Wurlitzer started popping up everywhere. Now it’s fairly common in all kinds of music.
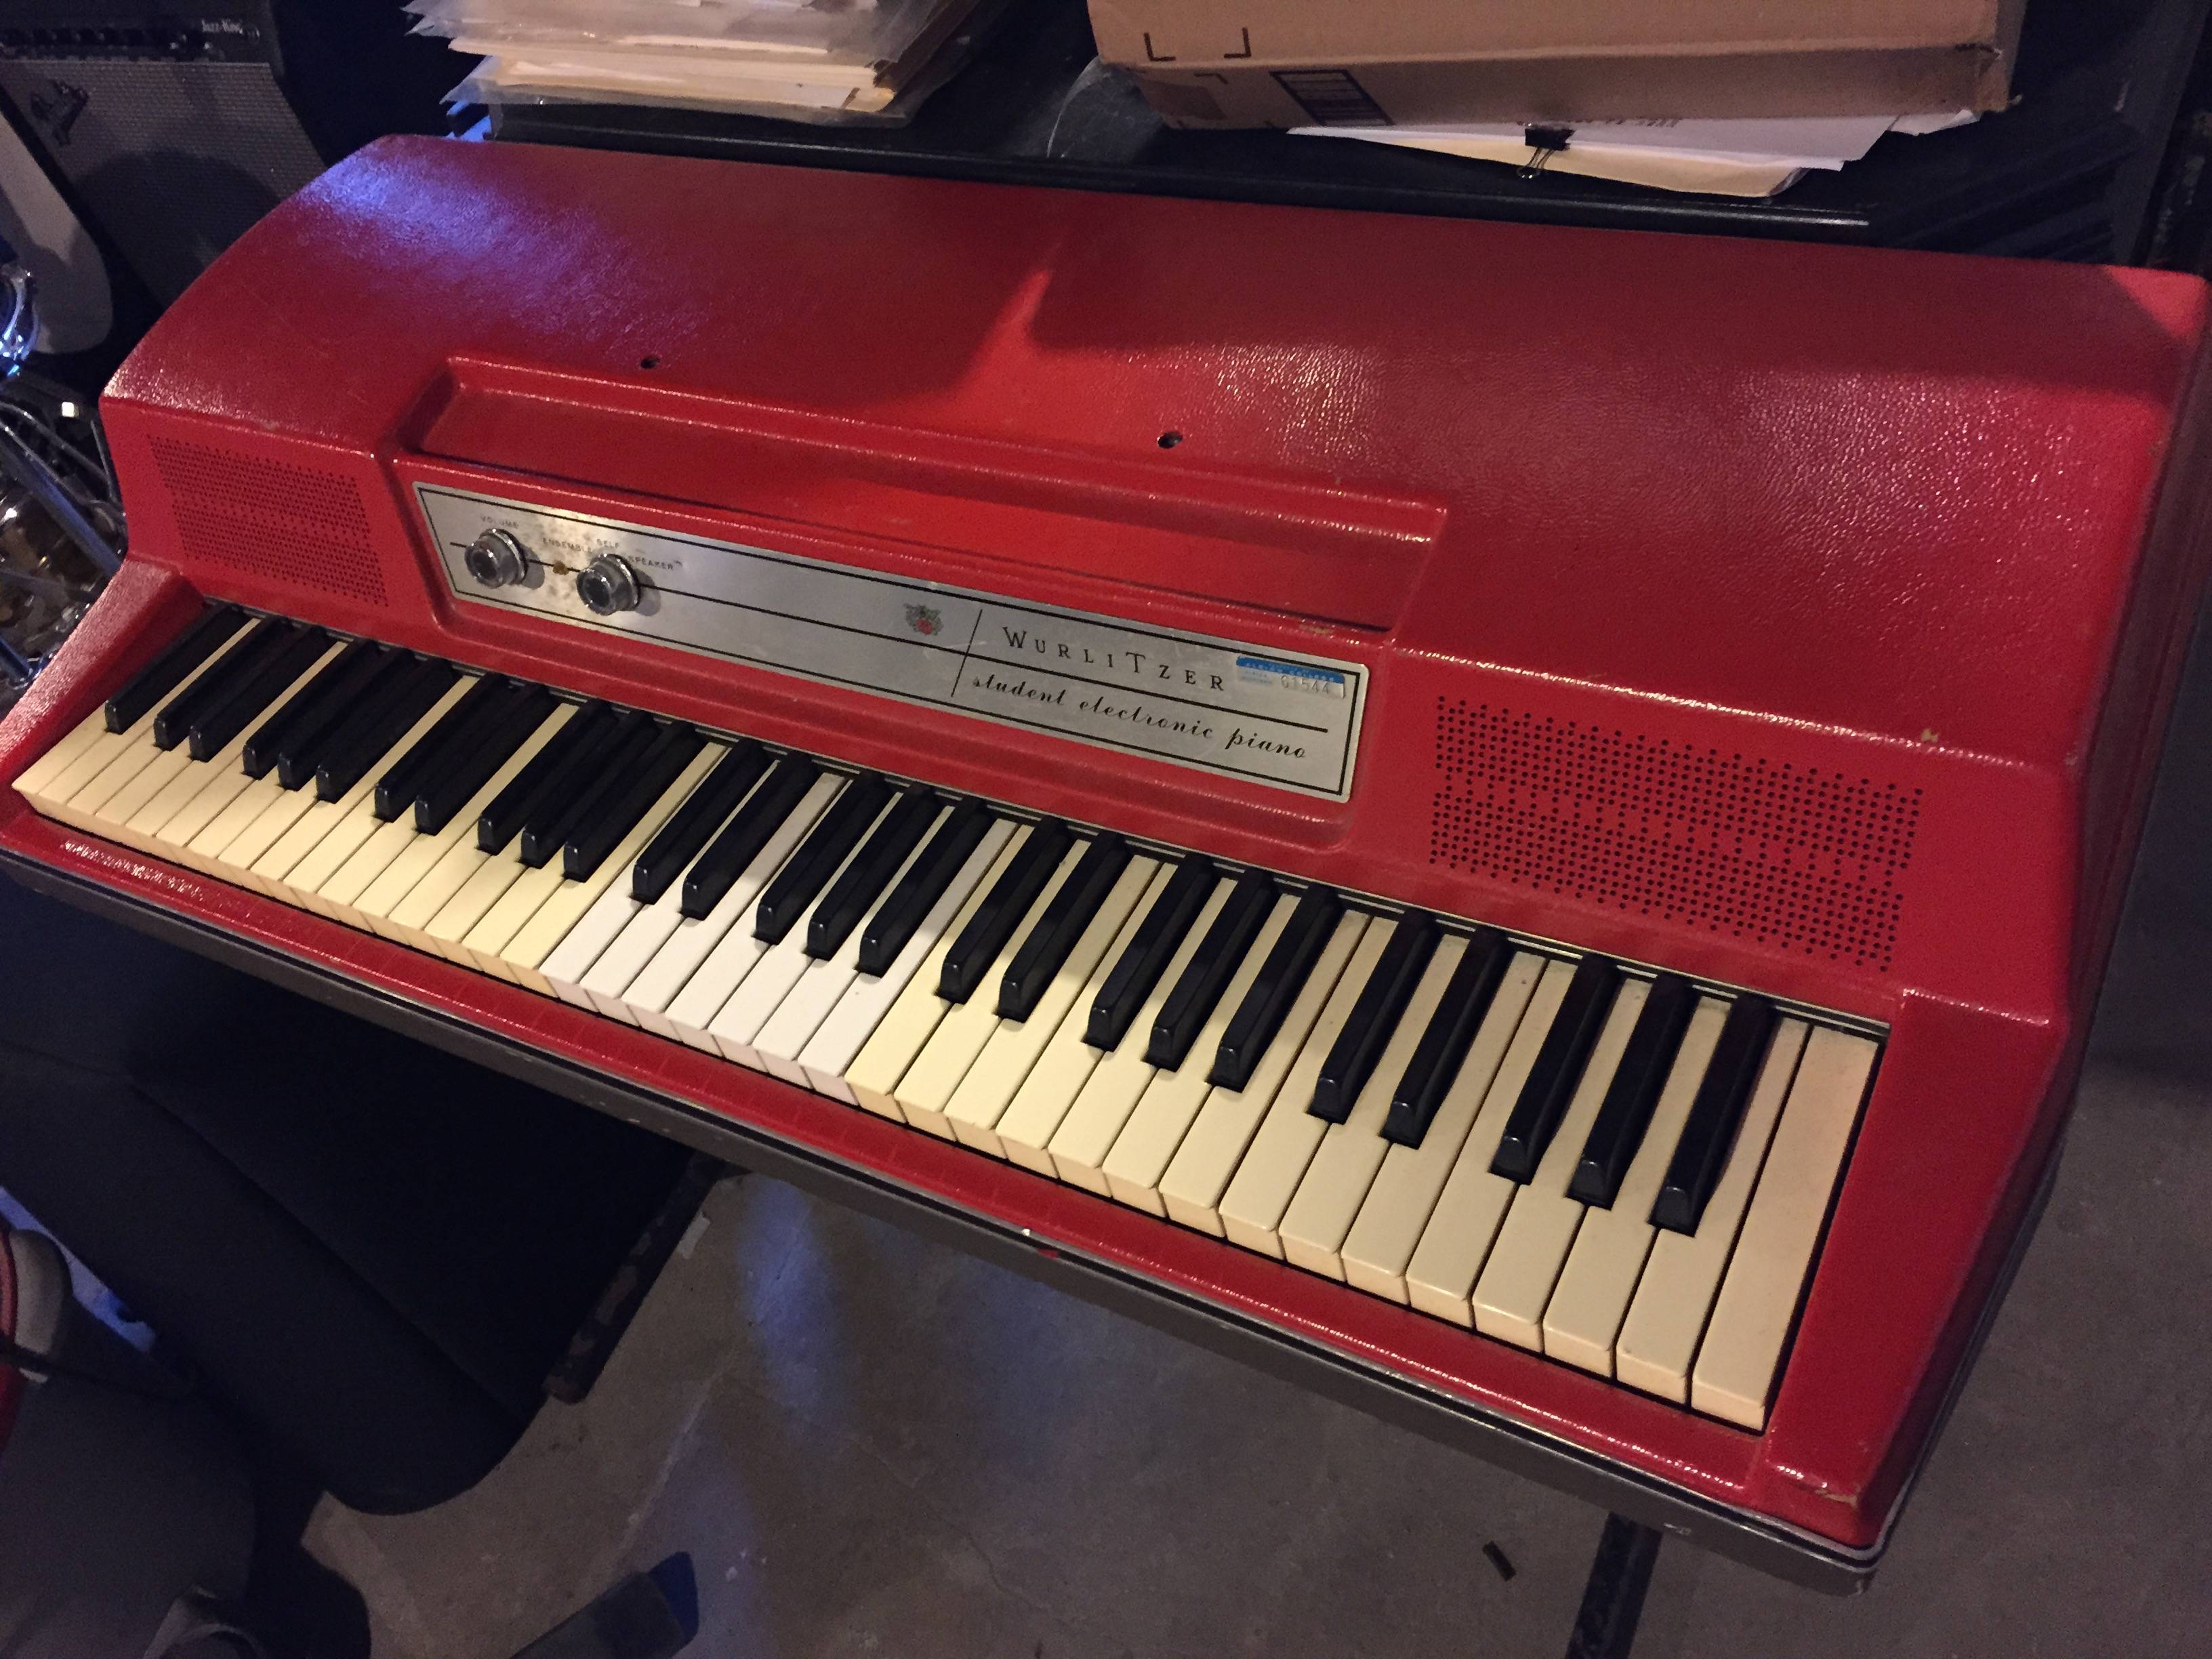
My (now sold) converted 206a, painted red.
I was gifted my first Wurlitzer, a student model 206A, from a friend who lifted it from his college. Colleges across the country used Wurlitzer student models as teaching tools in music labs. Up to 48 pianos could be linked together, each student able to hear him/herself via headphones. The teacher had the ability to listen to each student via a master console. Bill Fuller, a former Wurlitzer employee, was quoted as saying that up to 75% of American universities had Wurlitzer piano labs in the late 60s and early 70s. And in the mid 1990s, those universities started getting rid of them.
“And today class, we’ll learn how to play What I’d Say parts 1 AND 2!”
My friend’s college was no exception. After asking his piano professor to buy one of the many recently decommissioned 206A’s just cluttering up an alcove at the performance chapel on campus, one night he and his roommates decided to snag one and hauled it back to their dorm across campus. Just a week later, the rest were hauled away in a dump truck.
He gifted the Wurli to me. I removed the base, painted it red, and gigged with it for years. I used it on numerous recordings and even added tremolo to it. I very recently sold it because I have another student model in original condition. It served me very well.
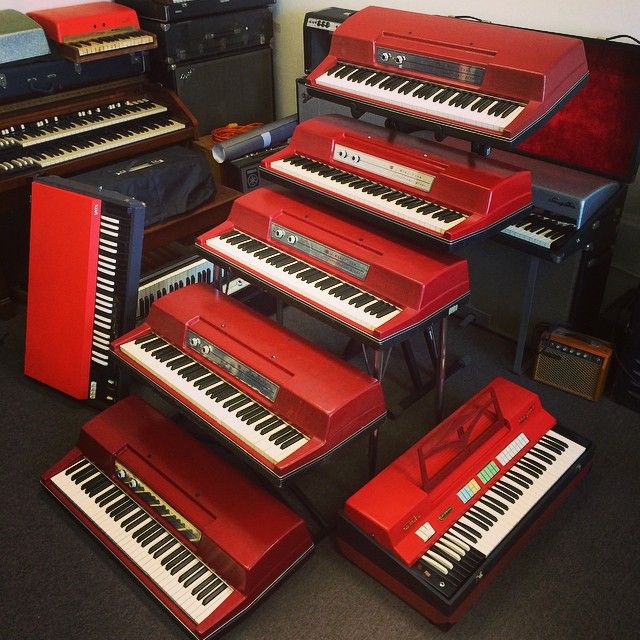
More red Wurlies, please.
The modern ubiquity of the Wurlitzer electric piano sound means that a lot of digital keyboards and synthesizers include their own take on it. But what many of them lack is that preamp grunge of the real thing. When I toured with Janiva Magness, I used a Yamaha Motif ES rack for my Wurlitzer sound for many years. I tried a lot of different pedals for it, trying to add some funk and grunge, but nothing really satisfied me. I couldn’t find anything specifically for keyboards.
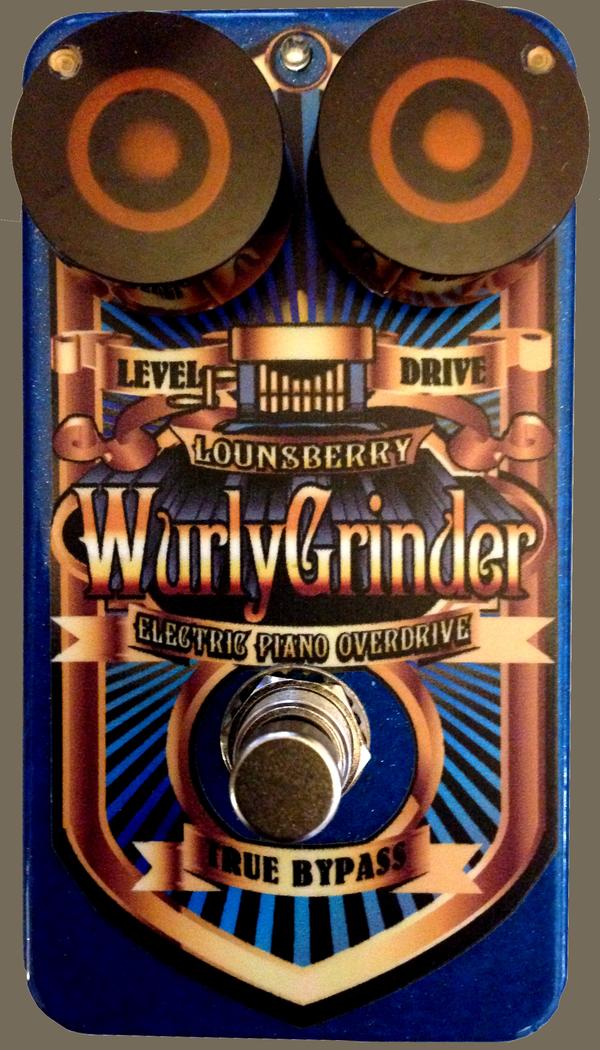
That’s where the Wurly Grinder from Lounsberry Pedals comes in. It is designed for the full frequency range of keyboards and can be used to fatten up a real Wurlitzer or Rhodes. But it really shines adding life and character to electric piano emulations, like those found in so many modern keyboards.
Lounsberry Wurly Grinder
Based on the same topography as the Organ Grinder (see my review here), the Wurly Grinder is has more gain, which allows you to use it with passive instruments like Rhodes stage pianos, and according to Greg Lounsberry the low end response is slightly modified to augment the specific frequency range and tonal characteristics of electric pianos.
Like the Organ Grinder, the Wurly Grinder is a standard sized pedal with ¼” input and output jacks on the back (a sure sign this was designed with keyboardists in mind) and a 9volt DC adapter connector on the left side. It is housed in a beautiful powder-coated royal blue sparkle chassis with two Gold Speed knobs, one for LEVEL and the other DRIVE. The front panel graphics are designed by steampunk artist Mark Hershberger and look really cool. A blue LED between the knobs lets you know when the pedal is active and like all Lounsberry pedals it features true bypass. The pedal is nice to look at, well-crafted, and really solid.
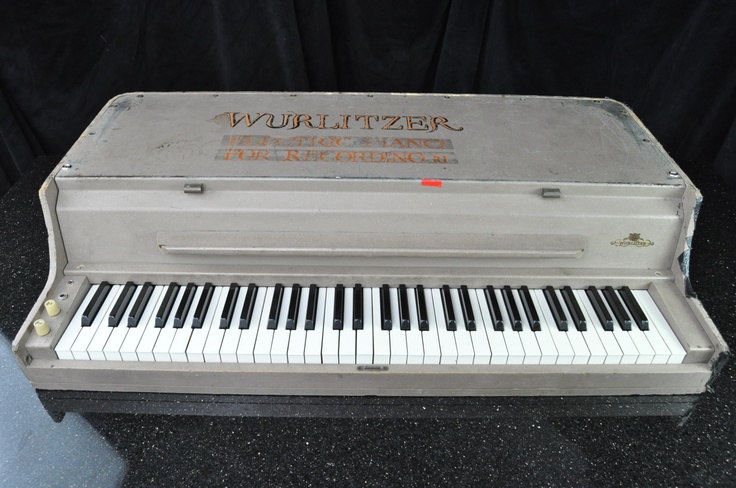
Wurli 140B tube model.
The Wurly Grinder was designed to impart a tube-like quality to any Wurlitzer emulation as well as make a solid state 200 series Wurli sound like an old 100 series tube Wurli. Want your clean Suitcase Rhodes to sound like a barky Stage model? It can do that, too. Hand matched FET transistors and germanium diodes do the work and the circuit inside is smartly organized and very cleanly wired.
The sound is very much like the Organ Grinder but with a more defined edge. You can play intervals other than fifths and still get good definition. The low-end seems a bit tighter to me, more focused, which is good for electric piano as they can be a bit muddy down there. It can go from a gentle fuzz to full on distortion but the range is controlled and very useable.
Hammond SK1
It helps the most on the Wurlitzer sounds in my Hammond SK1, adding life and color to the stock patch and smoothing out the inherent harshness in the samples. It sounds really great on my custom Wurli Cruzr patch on the Privia PX5s as well. Tweaking the amp simulations within the PX5s get me close, but I feel like the Wurly Grinder adds that next level of realism to the sound. I think any sampled or modeled emulation of a Wurlitzer or Rhodes would benefit from a bit of Wurly Grinder.
If you have the Organ Grinder already, do you need the Wurly Grinder? Well, if you’re going to use a passive instrument like a Rhodes Stage, then definitely. If you want a bit more definition from your EP samples, then certainly. Or if you’re like me you just like pedals and the cool things they can do, then why not? I’ve read that a lot of people also like the Wurly Grinder on guitar. Try one today and see if it adds that extra something to your electric piano sounds. Or try it on a virtual analog synth to add some girth and fat to the tone. It’s a very versatile pedal. I’m certainly keeping mine.
Thanks for reading and you can hear the Wurly Grinder in action by watching the video below.
As primarily a jazz organist, I mostly prefer a clean organ tone with plenty of headroom. Only when I really push the expression pedal do I want to hear the Leslie break up a bit, adding just a pinch of grungey spice to the Hammond stew.
Recording ‘Jim Alfredson’s Dirty Fingers – A Tribute to Big John Patton’ at GBP Studios in E. Lansing, MI. That’s a 1957 Hammond C3 with a 1958 Leslie 21H connected (not shown). My ideal sound for classic organ jazz.
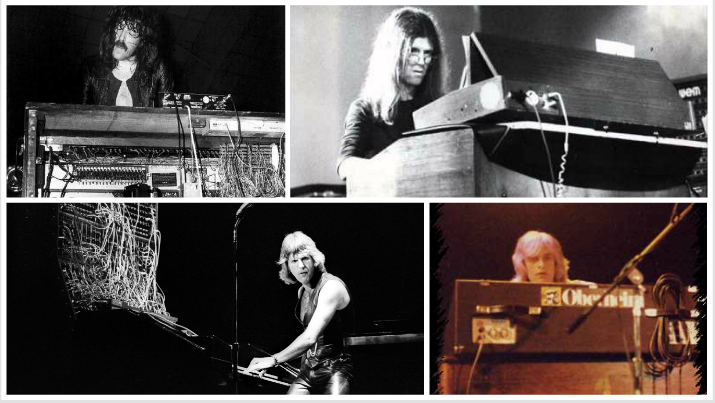
But I also grew up listening to the progressive rock keyboard gods of the late 1960s and early 1970s. One thing they all had in common was the Hammond organ and the most iconic among them liked a lot of dirt in their sound; Jon Lord (Deep Purple), Dave Stewart (Egg, Hatfield & The North, National Health), Tony Kaye (Yes), and of course Keith Emerson (The Nice, Emerson Lake & Palmer). A few years back, when I began recording my debut progressive rock album THEO – The Game of Ouroboros, I embarked on a quest to get that gnarly tone for my Hammond tracks as well.
From top L to R – Jon Lord, Dave Stewart, Keith Emerson, and Tony Kaye
In the age of digital Hammond organ emulators (known in keyboard parlance as ‘clonewheels’), the quality of the overdrive varies widely. My first clonewheel, the Roland VK-7, had a dedicated overdrive knob on the front panel, but it wasn’t all that convincing or useful. I tended not to use it and relied on a real Leslie 122 for the grunge instead. My next board, the Hammond XK3, had two real vacuum tubes in the outputs stage to accompany it’s Tube Overdrive knob, but again I never found the effect all that useful to be honest. And my current organ, the Hammond SK2, also has a dedicated knob for overdrive with four digital models of distortion available, my favorite being the EP Amp setting. But despite all these options, I still cranked my old Leslie 122, boosted the output on my 1954 Hammond C2, and recorded that combination for THEO. It just sounded the way I wanted it to sound.
Tracking my Hammond C2 through a Leslie 122 for THEO – The Game of Ouroboros in 2014.
Currently my favorite overdrive for organ comes from the Neo Instruments Ventilator pedals. It accurately emulates the sound of a tube Leslie driven pretty hard. But what if you want something even more? What if you want that overdrive to sound like the Leslie is about to blow up? What if you want some nasty, Jon Lord fuzz?
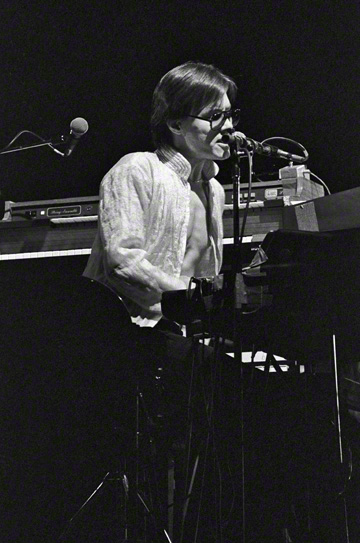
Enter the Organ Grinder from Lounsberry Pedals. The Organ Grinder is a stand-alone pedal in the standard guitar pedal format, but made specifically for keyboardists. Greg Lounsberry builds each pedal by hand at his shop in Smithsburg, MD. According to his website, the Organ Grinder was designed and built by request of Roger Powell, another of the 1970s progressive rock gods, best known for his work with Todd Rundgren’s Utopia. Roger was evidently dissatisfied with the overdrive in his clonewheel and asked Greg to make a pedal with the kind of pleasingly ‘flabby’ overdrive a real Leslie imparts.
Roger Powell performing with Utopia in 1978.
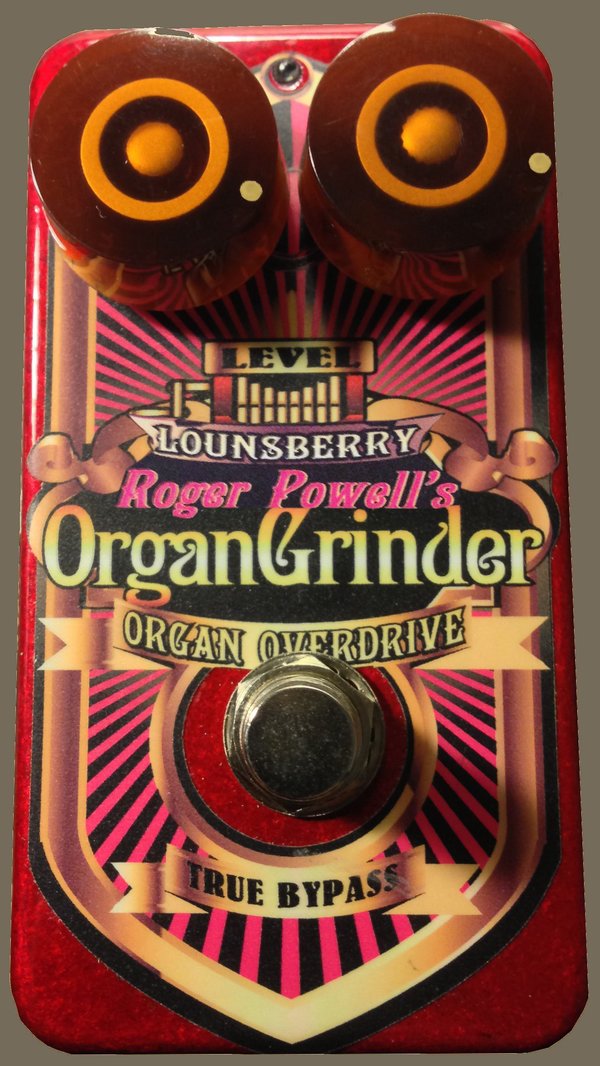
The Organ Grinder is beautifully made, with a candy-apple red powder-coated chassis, two Gold Speed knobs, and fantastic front panel graphics by steampunk inspired artist Mark Hershberger. It’s not only gorgeous but extremely simple to use. It has a true analog bypass ON/OFF switch as well as the two knobs, one for LEVEL and the other for DRIVE. The input and output jacks are on the back instead of the sides (a thoughtful touch for keyboardists) and it has a 9v DC input jack on the left side. It can also be powered by an internal 9v battery. The front panel is finished by a blue LED between the two knobs to signal the effect is on.
The Organ Grinder Pedal
It’s a solid state analog pedal utilizing FET transistors and germanium diodes. The hand-wiring is pristine and well executed. I would have no qualms about using this pedal on stage in terms of reliability. All the parts are high quality and the workmanship is top shelf.
So how does it sound? Let me put it this way: I’m currently working on a follow-up to THEO. I compose the songs in Cubase first, creating demo parts for each instrument in order to solidify the arrangement before replacing those parts with both real instruments and real players. For one of the songs, I used GSi’s VB3 software to demo the organ part. My original plan was to replace the track with the 1954 Hammond C2 and Leslie 122 combination mentioned above. But I decided to pull out the trusty Hammond XK3 instead, mainly because I wanted to use some effects on the organ itself. The XK3 makes this easy with it’s effects loop and standard outputs. So I connected my Mini-Vent rotary pedal, an Eventide TimeFactor, and an Eventide SPACE to the XK3. I set the overdrive on the Mini-Vent as high as it would go and it sounded nice, but I wanted more grunge for this particular song.
So I connected the Organ Grinder pedal before the Mini-Vent, turned off the Mini-Vent’s overdrive, and engaged the Organ Grinder.
I’d be lying if I said the sky opened and the angels sang… not only because it didn’t happen but my studio is in the basement, so I wouldn’t see it anyway. BUT… I did get a very big smile on my face as I found the perfect drawbar registration to compliment the absolutely devastating overdriven tone I was getting out of that old XK3. Whoa! I’ve never heard the XK3 sound that nasty. And it fit the track perfectly. The overdrive was even through the frequency range, never crispy or harsh, and with the rotary simulation of the Mini-Vent, really did sound like a poor Leslie tube amp about to blow it’s 6550 power tubes through the top of the cabinet!
Next I tried it on my 1968 Wurlitzer 206 electric piano on that same song. Again, I was smiling as it added just the right amount of grunge to the instrument, far better than any other overdrive pedal I’ve tried on EPs before (and I’ve tried dozens). The Organ Grinder is musical and natural; just like a tube circuit. From the first note you know it’s made for keyboards, with none of that midrange bump so prevalent in guitar pedals. Yes, you can play left-hand bass through this and it sounds great.
The Hammond XK3 with Mini-Vent and Eventide pedals.
Are there any cons to the Organ Grinder? The only one I can think of is that it is a mono pedal. If you want to use your clonewheel’s rotary speaker emulation in stereo, and it doesn’t have an effects loop like the Hammond XK3 or XK3c, then you’re out of luck. Perhaps if the Organ Grinder is successful or there are enough requests, Lounsberry might make a stereo version. I would definitely welcome it!
Needless to say, I’m keeping the tracks. And I’m keeping the Organ Grinder. Kudos to Greg Lounsberry for making a pedal that fulfills a real need in the modern keyboardists’ arsenal. Go get one!
Thanks for reading and you can hear the Organ Grinder in action by watching the video below.
We’re almost ready to begin post-production and mixing on the new organissimo album which is a tribute to the Beatles. Here’s a full-length song from the upcoming CD.
For this recording in my humble home studio, I’m using my beloved 1954 Hammond C2 through a 1956 Leslie 21H. The Leslie is miked with a pair of heavily modified TNC ACM-6082 tube condensers in a Blumlein pair on top and an Electro-Voice RE20 on the bottom.
One thing yet to finish is a version of Within You Without You. In preparing for this CD, I asked my elder sister (who is responsible for a lot of my musical tastes) for her favorite Beatles song and she answered with that psychedelic, classical Indian inspired cut from the seminal Sgt Pepper’s album. I’ve decided to do something a little different with it, however, instead of a straight organ trio live studio performance.
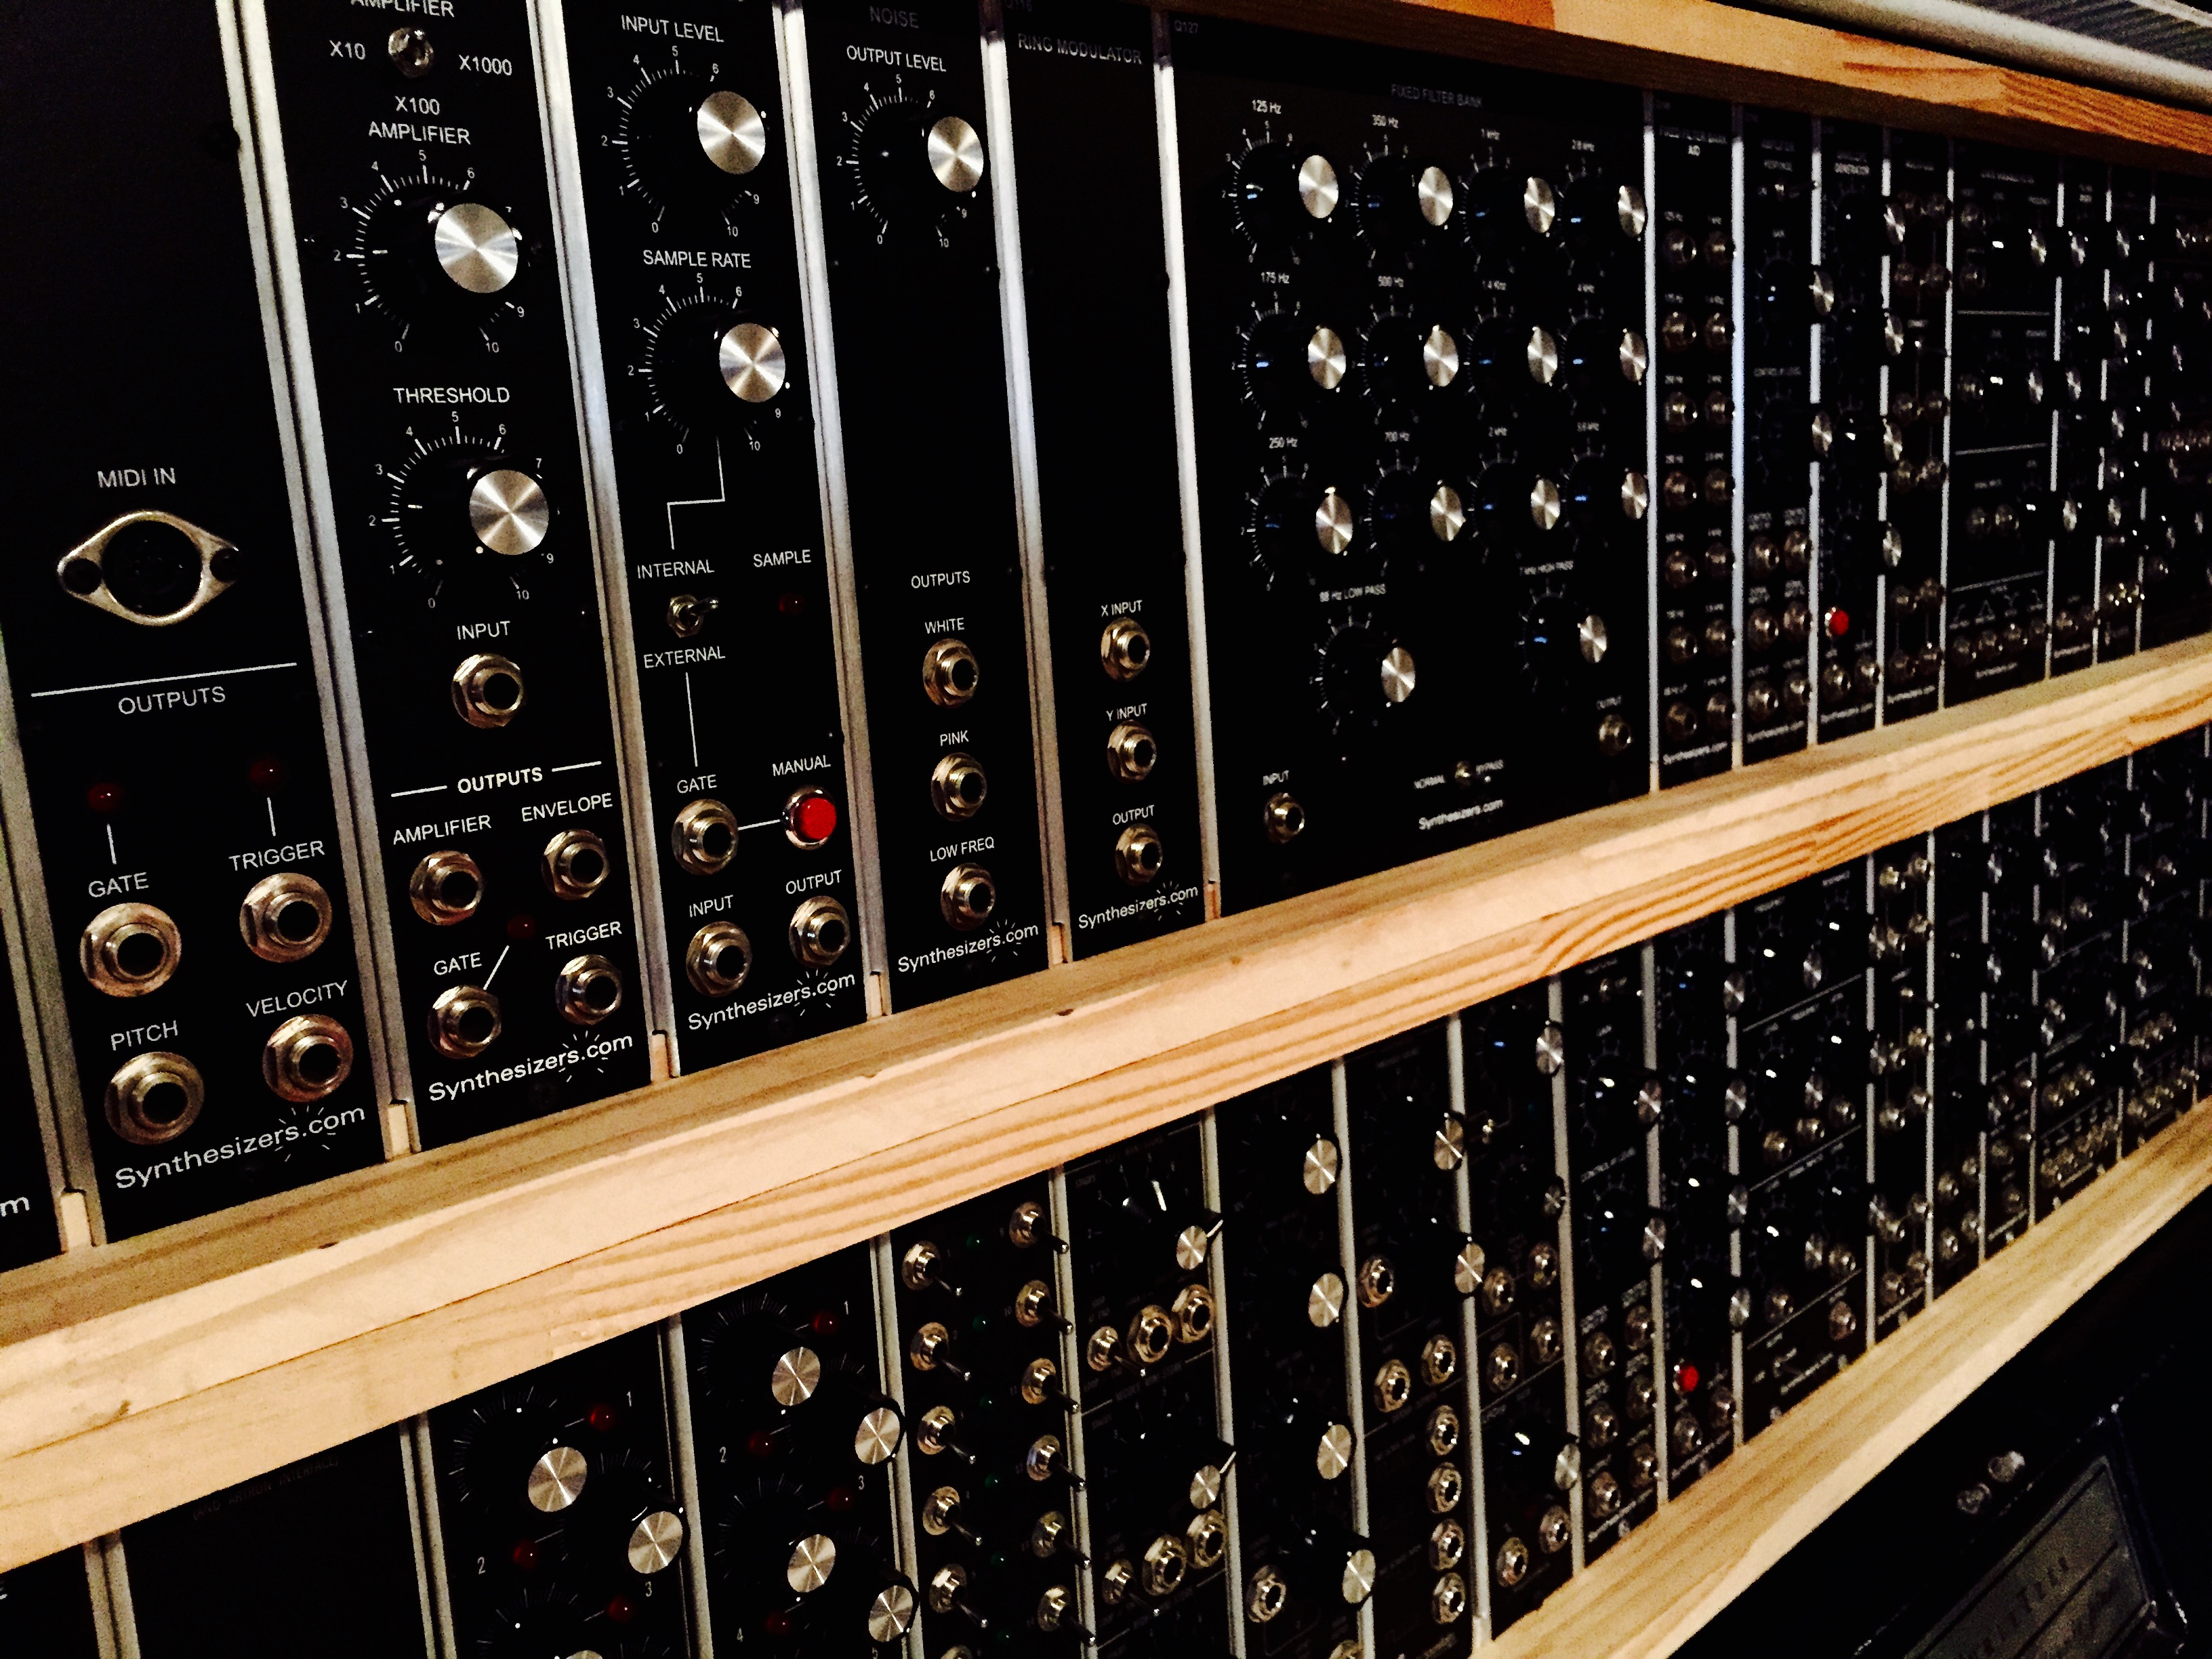
synthesizers.com modular
First I had drummer Randy Marsh play the iconic drum groove from Tomorrow Never Knows off the Beatles’ Revolver album. I absolutely adored this album as a kid and listened to it over and over again. Next I looped an 8 bar snippet from Randy’s performance to create a hypnotic almost electronic drum track. Next I will craft a tambura-esque patch on the mighty synthesizers.com modular as the drone. Then I will play the melody on organ, but with a surprise twist (to be revealed later). And finally I’ll bring Larry in to add some guitar pyrotechnics over the top. So like the Beatles, we will be constructing this piece in the studio, using the studio as another instrument.
If you’re intrigued, head over to organissimo.org and sign up for the email list to receive notifications of the album’s release and other newsworthy items. I should mention we’re also working on a live CD and video and another entire CD of original material. Here’s an example of that.
In the meantime, I’m also finishing up mixing for Big Apple Blues’ new album, writing and recording new material for the upcoming follow-up to my progressive rock debut THEO, and I’ll be playing shows this spring and summer in Belgium, Hong Kong, Chicago, and of course all over my home state of Michigan!
I wanted to not only bring the keyboards back to the forefront in rock music but also strike a balance between classic vintage sounds and more modern textures. In this multi-part series, I will describe the different keyboards and synthesizers, both hardware and software, that I used on the album.
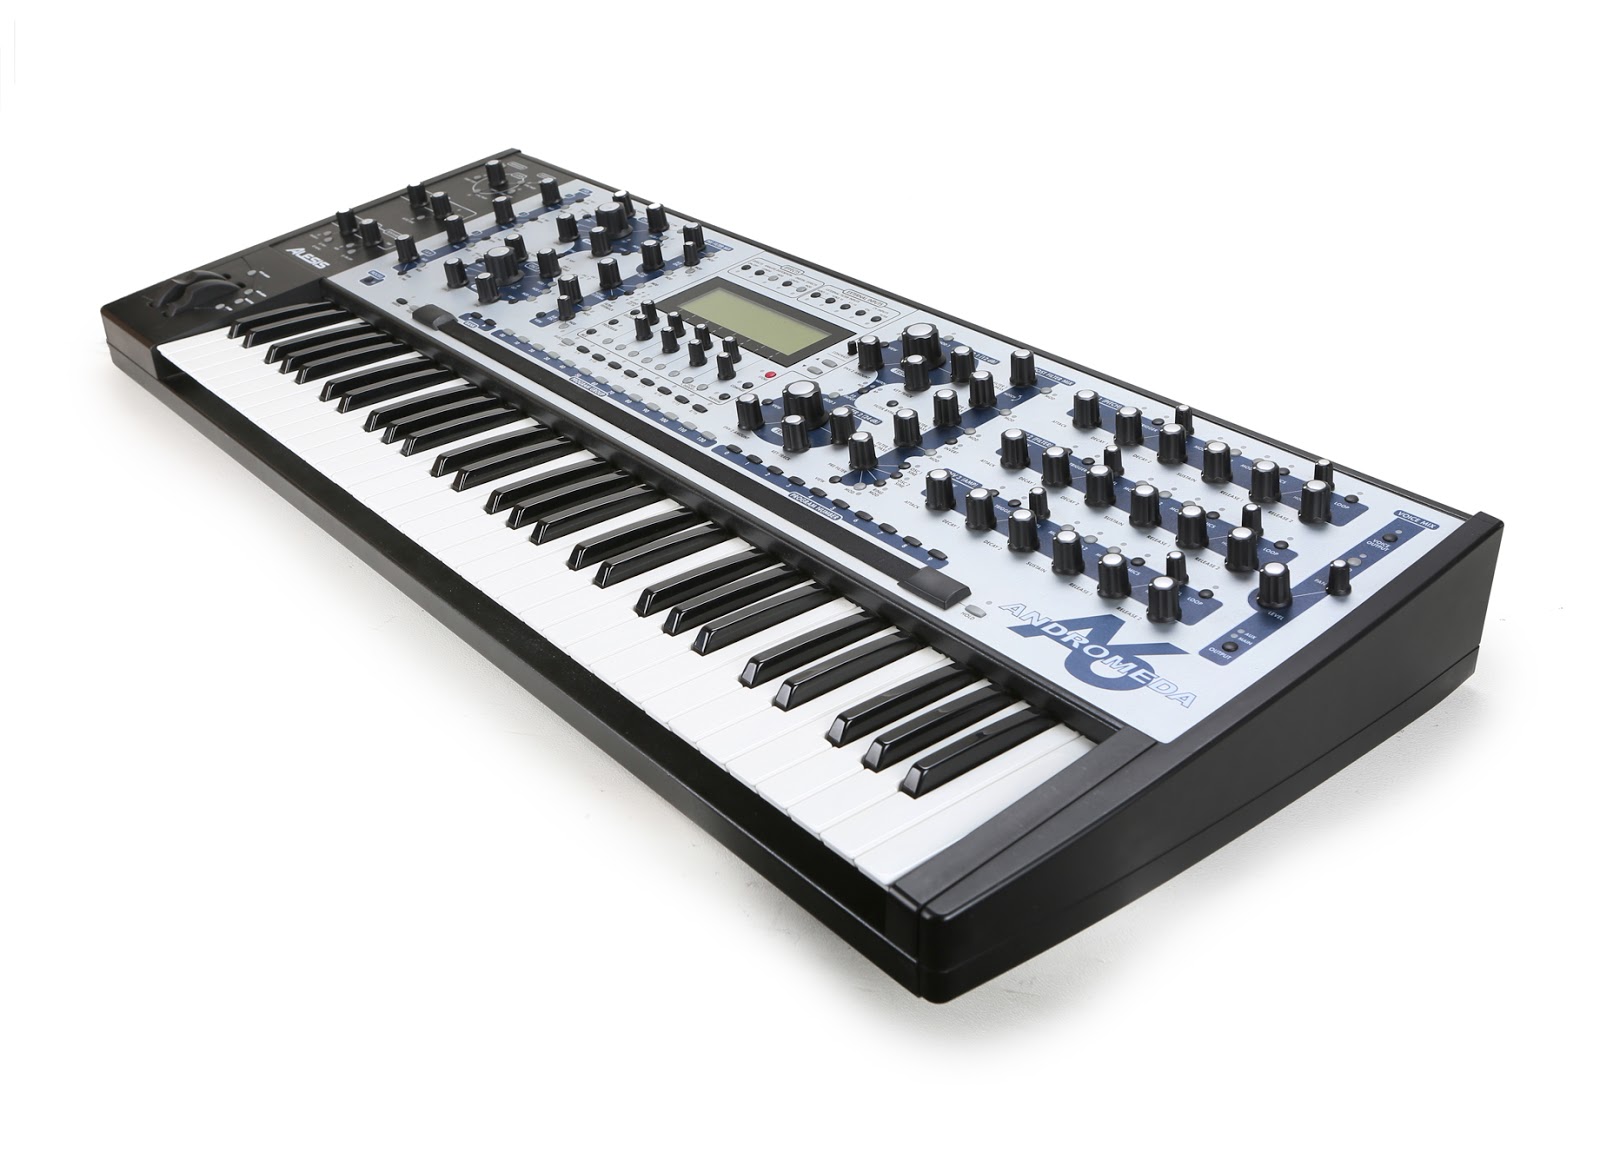
ALESIS ANDROMEDA A6
Let’s just get this out of the way: The Alesis Andromeda is a monster synthesizer. Released in 2000 and discontinued in 2010, the Andromeda is arguably the most powerful analog polysynth ever made.
The specs are impressive: 16 voices, 2 oscillators per voice, 5 waveforms, 2 multi-mode filters, a powerful pattern sequencer, an arppegiator, a really cool ribbon controller, and knobs knobs knobs a-plenty.
Alesis Andromeda A6
Yes, there are some weaknesses including the lack of promised poly-aftertouch and some bugs in the OS. It is also built with proprietary chips and parts are getting scarce. But the sound is incredible. It is capable of emulating a wide range of classic sounds including Minimoog style leads and basses, Oberheim pads and brass, Prophet-5 type sync leads, and even sounds reminiscent of the mighty CS80.
The Andromeda enters fairly early on THEO. That thick, swirling string sound at the intro of the very first song (the title track) is the Andromeda through an Eventide SPACE reverb pedal and then filtered in Cubase.
The Andromeda returns on the third track, Creatures of Our Comfort, in the form of the panning synth string pad and the more mellow pad. It also covers the deep synth bass at the very end.
The string sound from the first song re-appears in the instrumental section of These Are The Simple Days and it’s the last sound you hear as the instrumental section transitions into the lyrical reprieve that ends the song.
The Andromeda is all over the next track, Idle Worship, including the panning arppegiating lines and that fantastic brass swell that sounds like UK’s classic song Alaska.
One of the coolest features of the Andromeda is the inclusion of 16 dedicated outputs, one for each voice, via eight 1/4″ TRS jacks on the back. On Idle Worship, I recorded the arppegiated lines by connecting all 16 mono outputs to a mixer, and then randomly assigning each of those 16 outputs to eight sub busses. I then recorded those eight sub busses into Cubase and panned them randomly around the 5.1 surround field so that each note of the arppegiated pattern appears at a different spot in space. The effect is pretty amazing, with notes in quick succession appearing in completely different places around your head. Even in stereo it sounds cool! Here is a test I did before the actual recording to hear how it sounds.
On the final song, Exile, the Andromeda is generating that phased string sound that reminds me of the old ARP Solina string ensemble during the quiet middle section. Originally I had used a patch from u-he’s Zebra but decided to program the sound on the Andromeda instead and I’m glad I did. It fits into the mix so much better. I believe I ran the outputs of the Andromeda into a MoogerFooger Phase pedal. The Andromeda is also doing the arppegiated line during the epic end solo section.
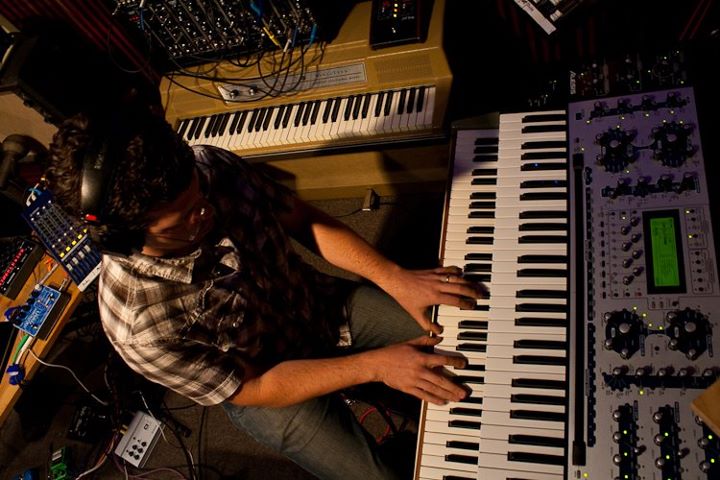
In the studio at Glenn Brown Productions for an Intergalactic Spiral session. Photo by Corrina Van Hamlin.
The Andromeda is a desert island synth for me. I hope mine never succumbs to the issues that some users have experienced, issues that can render it useless. After Alesis folded and emerged from bankruptcy under new ownership, the Andromeda was never the same and some of the later models exhibit problems including failing proprietary components. Mine appears to be functioning at 100% so far and I hope it continues to do so for years to come. It is truly the King Of Analog Polysynths and rewards patience in programming with stunning sound.
UPDATE (July 11, 2015):
Before I purchased the Andromeda, I seriously considered buying an Oberheim Matrix 12 instead. At the time, both synths were about the same price on the used market. Since that time, the Matrix 12 has almost doubled in price and Andromeda prices have stagnated. I always wondered if I made the right decision.
A few months ago I finally got my hands on a Matrix 12 via a friend who amassed quite the vintage synth collection and while the sound was great, it didn’t blow me away. Then again, we were playing it through an mono tube amp with a small speaker. I came home confident that I made the right decision to buy the Andromeda.
Just a few days ago as of this post, that friend brought the Matrix 12 over so that I could make a demo for him. He’s selling it and since he’s not a keyboardist, he asked me to perform. Connecting the Matrix 12 to my studio monitoring system and hearing it in stereo was incredible. Here’s a video of the proceedings:
What an amazingly rich and lush sound. In the past few days, I’ve experienced doubt yet again whether I made the right choice. So I’ve spent some time really sitting down with the Andromeda and getting to know it better. And I’ve discovered some more strengths and weaknesses.
Firstly, the UNISON X mode is incredible. By default, the Andromeda triggers two oscillators per note, each with five waveforms available simultaneously. By pressing the UNISON X button, you can make the Andromeda trigger four oscillators per note, or six, or eight, all the way up to all thirty-two (sixteen voices times two oscillators per voice). And you can detune them with one knob turn as well. This can make a thin and dull patch sound absolutely enormous instantly.
Secondly, I learned that it’s really easy to overdrive the filters both pre and post, which can lead to wave shaping (ie, distortion). Turning down the feed of the oscillators into the filters creates a much smoother, more pure analog sound.
But I also learned that the panning leaves a lot to be desired. One of the coolest features of the Oberheim is the ability to pan each voice anywhere in the stereo field, or do so randomly. This ability further increases the sense of largeness of the Oberheim. Although there are a vast number of modulation sources for the panning, none of them that I found achieves that random voice panning effect and they all seem to affect the entire output, not individual oscillators or voices (two oscillators each). The only way to really do this is to use the individual voice outputs connected to a 16 channel mixer and set the pans on the mixer wherever you’d like. This seems like a rather confusing oversight on the part of the OS design team.
Despite this and with the help of the Andromeda Tips & Tricks article, I’m programming some really nice, deep, rich sounds from the Andromeda. My lust for the Matrix 12 is not gone yet, but it is abated somewhat.
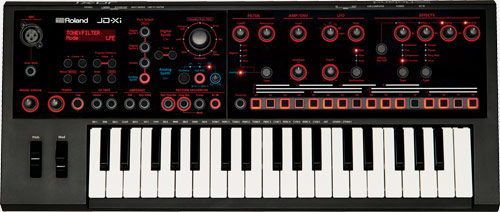
I’m honored that Keyboard Magazine asked me to review the new Roland JD-Xi synthesizer. The written review will appear in the upcoming May 2015 issue.
Roland is marketing this mini-key synth as a “Crossover Synthesizer”. This double entendre refers to the combination of a two-part digital synth engine with a monophonic analog synth engine that’s reminiscent of the SH-101 and that the synth is supposed to appeal to both synth enthusiasts / keyboard players, and non-keyboard playing musicians / producers as well.
Keyboard Magazine posted a video I made in my humble home studio detailing the main features of the instrument. The enthusiast site Synthtopia posted it as well and some of the comments are funny! Several people complained that the video didn’t go in depth enough (that’s because it is an overview, not a review). Other people claimed a vast conspiracy headed by Roland to dissuade any negative press. And about a half dozen people commented on my shoes and the “poor production quality” of the video. I’m now officially referring to this as Shoe-gate!
To ‘clear the air’ about my funky footwear in the video; they are a pair of 15 year old New Balance sneakers that are my “bum around the house” shoes. I had forgotten I had them on when I recorded the video but other than the faux pas about the filter (which is obviously a 4-pole/24db filter and not a 24 pole filter; I simply misspoke) I thought the video did what Keyboard asked; that is, give a brief overview of the features. It is not intended as an in-depth review, which again is being printed in the May 2015 issue.
I’m thinking that quirky kicks will be my trademark from here on out! What will I wear next?
Get ready, Synthtopia nerds! I’m coming for you!
Here’s the video. Avert your eyes if you are offended by loathsome loafers!!!
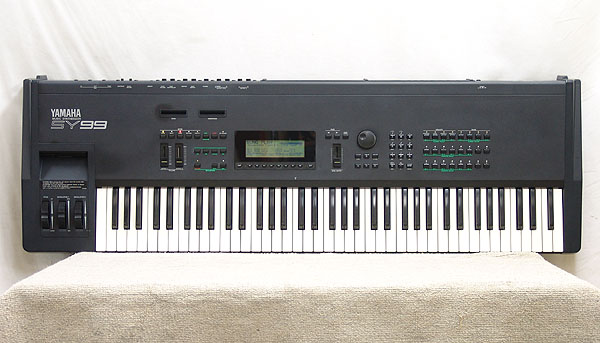
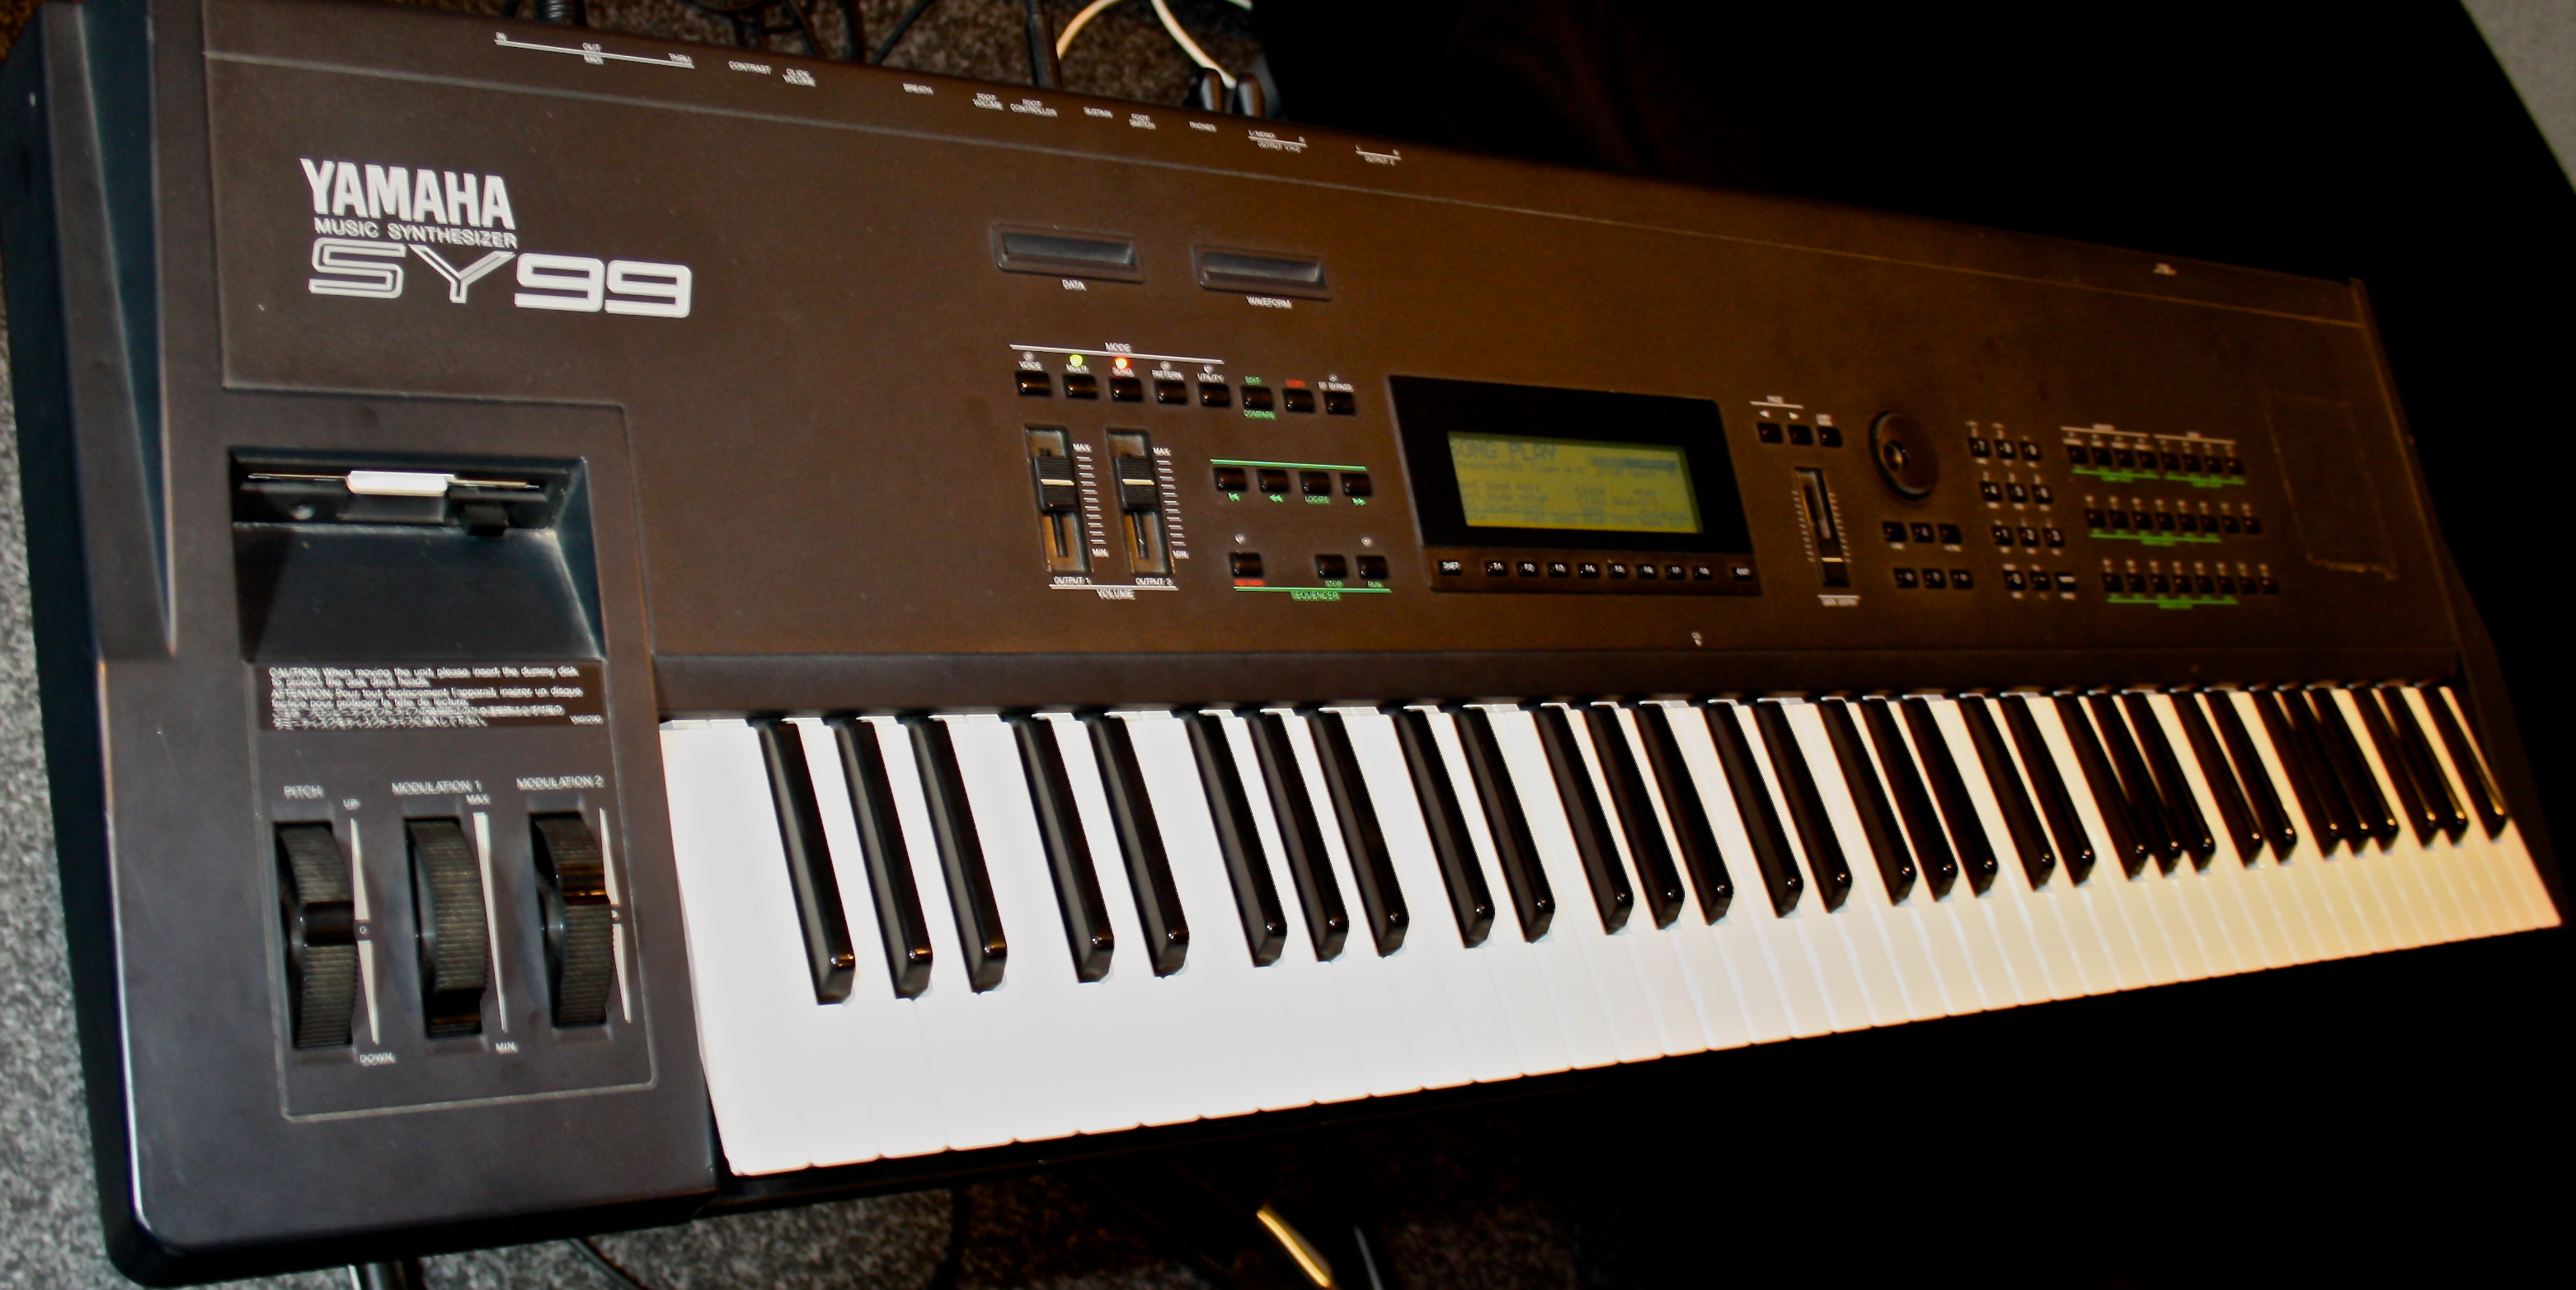
The Yamaha SY99 synthesizer was released in 1991 as the flagship of Yamaha’s line. Around that same time (maybe 1990?) my father and I drove to Detroit from the Lansing area with $2000 in cash to purchase a floor model of the SY99’s little brother, the SY77. Having sold his Yamaha DX7, Yamaha RX7 drum machine, an Ensoniq ESQ-1, a Fostex four-track cassette recorder, and some other goodies to fund the purchase, my dad and I were very excited to get the SY77. I loved that synth and used it every day for years and years. But I have to admit I always lusted after the SY99 because you could load your samples into it’s massive 512kb internal memory! Watch out!
Yamaha SY99. Ironically, this jpeg is larger than the internal user sample memory available in the SY99.
I still have the SY77 as briefly discussed in a previous post and since everything is cyclical, the digital synth behemoths of yesteryear are not worth all that much these days, with a few exceptions. Everybody has gone analog crazy! So a few years ago I found and purchased an SY99 for a ridiculously low price. I used it sparingly on In Memorandom and I’ve been slowly programming a bank of analog emulations using only the FM engine. Otherwise, it hasn’t seen much use.
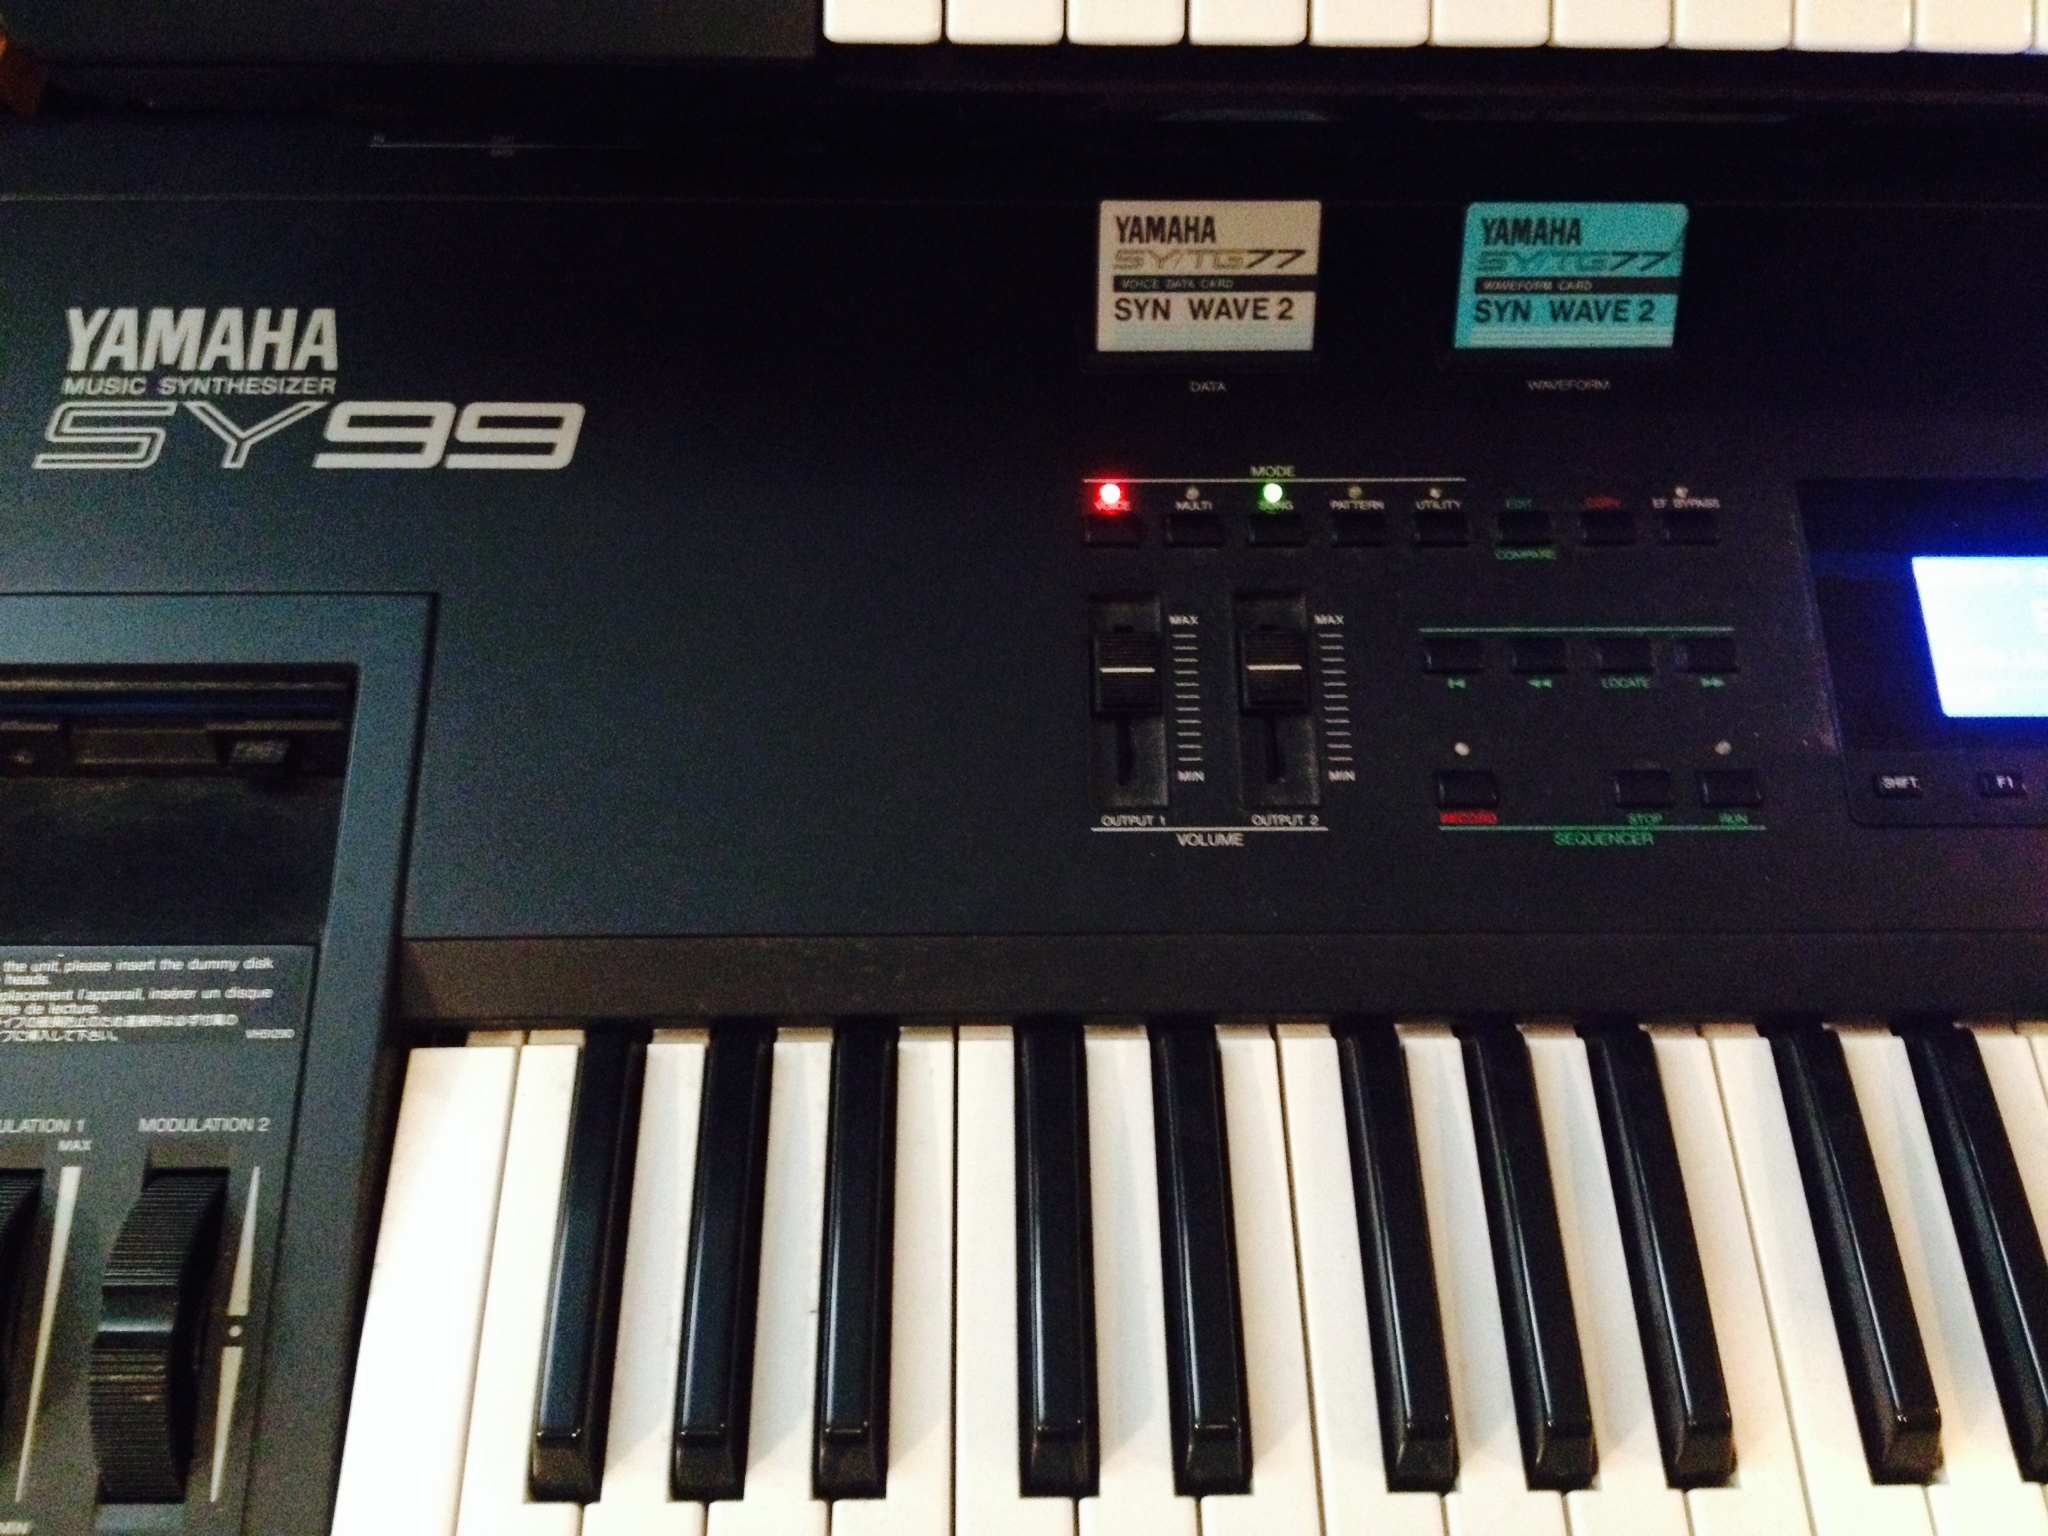
Yamaha SY99 with the SYN WAVE 2 voice and data cards.
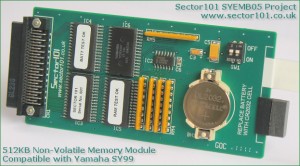
Lately I’ve been looking for some waveform cards. These are cards that Yamaha released to expand the available waveforms for the SY77 and they are compatible with the SY99 as well. I also recently discovered that someone is working on creating new waveform cards that can be loaded with your own samples! Amazing. That same person reverse engineered the RAM expansion cards, which are impossible to find, and offers the recreations for sale on his Sector 101 page. He also offers FLASH RAM for the Yamaha EX series, again reverse engineered. I like this guy!
Sector 101 SYEMB05 RAM expansion module for the SY99.
But back to the waveform cards: I’ve been searching for a particular set for a few years and finally found them for a decent price on eBay. The SYN WAVE 2 card contains sampled waveforms from the venerable Yamaha CS80 and has a companion card with patches created from these waves. So I decided to make a little demo of it!
For the video, I connected my SY99 to the Eventide TimeFactor and SPACE pedals. The onboard effects in the SY99 are not the best, though they were quite good for the time. Some of the patches use a combination of onboard effects and the outboard pedals but most have the internal effects bypassed. All sounds are from the SY99 SYN WAVE 2 card set with the exception of the drums, which are from the Roland JD-Xi that I just finished reviewing for Keyboard Magazine (more on that neat little synth in a later post).
The SY77 and SY99 are capable of some amazing sounds. The AFM (Advanced Frequency Modulation) engine is very powerful and flexible and they are the only synthesizers I know, software or hardware, that can use sample waveforms as operators in the FM synthesis engine. Plus they are built like tanks. My poor SY77 has survived six foot drops onto concrete and hundreds of gigs in its 25 years of service. So far I’ve only had to replace the floppy drive belt, LCD screen (which dim over time), and the small battery that powers the internal memory when turned off. I did the same to the SY99 when I received it. Up next is replacement of some of the push buttons on the SY77, which are beginning to fail after years and years of repeated use.
I would love to see Yamaha release another FM synthesizer coupled with the modern Motif AWM2 engine. But that will probably never happen in this age of inexpensive software synths. However, if the recent acquisition of Camel Audio by Apple proves anything, it’s that software is only as reliable as the support it receives from the company. I adore Camel Audio’s Alchemy and use it constantly. It’s on every track on THEO – The Game Of Ouroboros, usually multiple instances of it. And now the company is under Apple’s banner and most likely will not support PC users like myself anymore. So be it. But hardware survives even the death of the manufacturer. And with third party folks like the aforementioned Sector 101 guy supporting them as well, it looks like the SY series will be around a long time.
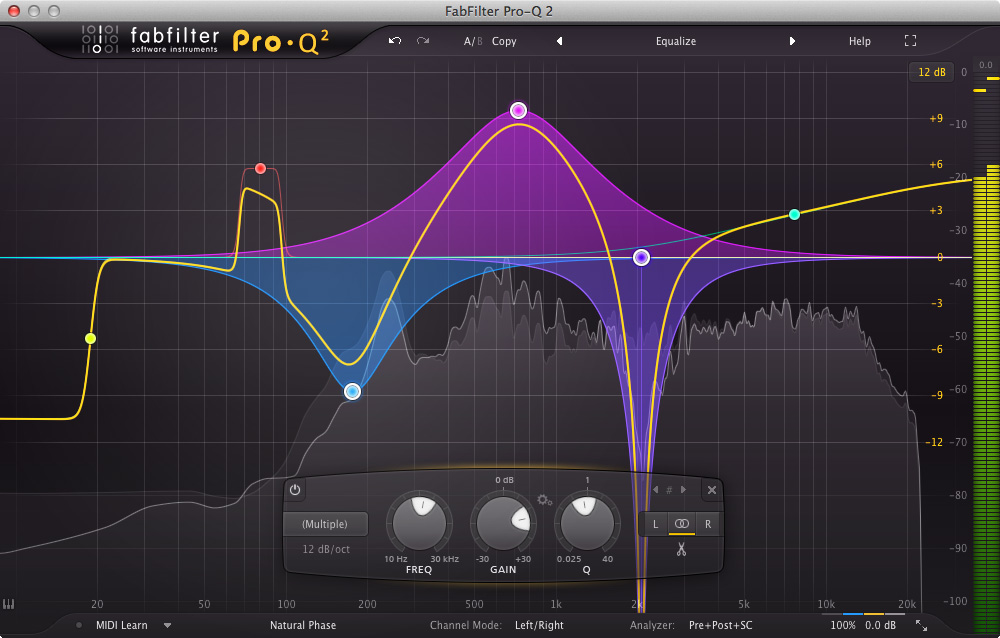
I don’t recall how I stumbled upon FabFilter. Most likely I was searching for alternatives to the much pricier Sonnox plug-ins, specifically the Oxford EQ. Somewhere in the mire of forums and blogs I ran across the Pro-Q and decided to try the demo. I remember I bought it almost instantly. The single most important factor in that decision was the beautiful GUI. The idea of combining a spectrum analyzer and an incredibly simple user interface was novel to me.
That was in 2012. In the two years since, I’ve also purchased many of FabFilter’s other plug-ins, including the Pro-L, Pro-MB, Pro-C, Pro-DS, Pro-G, Saturn, and Twin 2. I have used them on every project I’ve done since, including organissimo’s Dedicated, Jim Alfredson’s Dirty Fingers, my upcoming progressive rock project THEO, Greg Nagy’s upcoming third album, and various other mixes and songs for other artists. The Pro-C is the first compressor I load for drum parallel compression and bass guitar. The Pro-DS is an amazing de-esser that I use on all vocal tracks. The Pro-G is an amazingly flexible gate that can sound completely natural. I love it on toms. And the Saturn is a great saturation plug-in that I like to use on VST synthesizers, especially analog emulators, to give them more depth, character, and girth.
Out of all of them, the plug-in I use the most is the Pro-Q. And I’ve been immensely happy with it. I didn’t think it could be improved but FabFilter managed to do just that in version 2. Dan Worrell’s fantastic video tutorial gives a solid overview of the new features.
The new features include:
Different interface sizes and additional Full Screen mode
Operates in zero latency mode, linear phase mode with adjustable latency or the unique Natural Phase mode
Spectrum Grab: just grab and adjust a peak in the real-time spectrum analyzer right away!
Universal filter slope support for all filter types, up to 96 dB/oct
EQ Match feature to automatically match the spectrum of another track via the side-chain input
Phase Invert option to change polarity
Highly improved CPU optimization: Pro-Q 2 uses less memory and is more than twice as efficient as its predecessor!
Optional Gain-Q interaction
Auto Gain and Gain Scale
Built-in spectrum analyzer with Pre-EQ, Post-EQ and SC modes, adjustable range, speed, resolution, tilt and freeze
GPU-powered graphics acceleration
Optional piano roll display to quantize EQ frequencies to musical notes
Large output level meter with peak level readout
This is a significant update and well worth the very reasonable upgrade cost. I’ve already upgraded and integrated the new version into my work flow. The new Natural Phase mode is really amazing for adding air to individual tracks or the overall mix. Spectrum Grab is incredibly useful for quick fixes and taming resonances. And the piano roll frequency display saves a lot of time.
FabFilter still has the best GUI in the business and the easiest user interface. With the added features, it just became more useful and quick. If you’re looking for something better than your DAW’s native EQ, check out the Pro-Q 2.
FabFilter Pro-Q 2
Postscript:I read an interesting article about the differences between digital (aka plug-in) EQs. Essentially once you strip away the analog emulations, there really is no difference. Some plug-in EQs also attempt to emulate the non-linear behavior of analog circuitry including harmonic distortion, noise, etc. And those emulations do vary from plug-in to plug-in. But once removed, the basic sound is the same and even those characteristics can be successfully duplicated with a standard PEQ with a bit of tweaking and good ears and maybe a saturation plug-in inserted before or after. So with that said, why spend money on something like Pro-Q 2? Well, the Natural Phase mode is an analog emulation that does what it is supposed to do very well. But first and foremost, it’s about ease of use. The GUI is so good and the interface so easy to work with that the price is more than reasonable. For most purposes, I can achieve the same results with the built-in track EQ in Cubase but it is nowhere near as intuitive or easy to use, despite the recent addition of a per-track real-time spectrum analyzer.
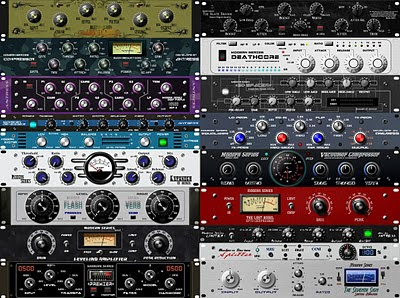
As the processing capabilities of personal computers increase and the skill of programmers to emulate analog audio qualities in digital form also improve, plug-in companies have rushed to digitally re-create almost every piece of classic gear from the golden era of recording studios. These studio stalwarts exist in several incarnations from various companies, with varying degrees of success. You’ve got your Pultec emulations, your 1176 emulations, your LA2A emulations, Neve, API, and SSL emulations, plate reverb emulations, EQ emulations, microphone preamp emulations… and the list goes on and on.
Plugs plugs plugs plugs plugs plugs plugs plugs!
One manufacture from that era conspicuously absent so far is Valley People of Nashville. The history of Valley People is quite interesting and you can read more about it on their website. The short version is that an electronics guru named Paul Buff worked with Frank Zappa to build Zappa’s famed PAL studios and designed some proprietary gear in the process. A short time later, Buff officially formed Valley People and put those designs into commercial products including the Gain Brain, Transamp, Kepex, and the Dyna-mite.
My first exposure to Valley People gear was in my friend Glenn Brown’s studio. He had an rack of the now defunct 800 format filled with Kepex and Gain Brain modules. I noticed he liked to use them on drums. But his real secret weapon was a stand-alone stereo Dyna-mite compressor. He no longer has the rack, but he still uses the Dyna-mite frequently as a drum bus parallel compressor, a role in which it absolutely shines.
An original Dyna-mite in a beige plastic case. This is like the one my friend Glenn owns.
You can still pick up an original Dyna-mite unit on the used market for a reasonable price. We’ll see how long that lasts! Of course the limitations of outboard gear include the lack of recall and the obvious fact that you can only use it on one or two things at a time unless you own a rack of several. Who has space for that?
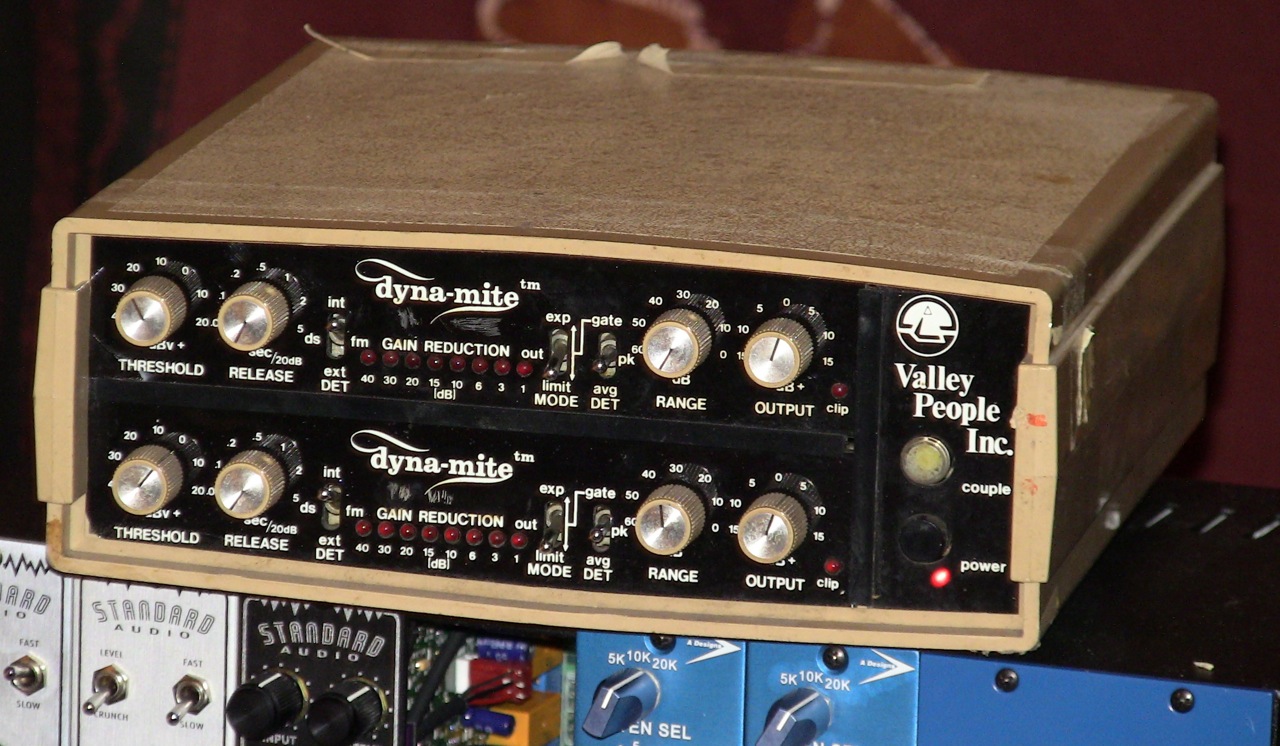
So I was very excited when I found Softube’s digital version of the Valley People Dyna-mite. If it captures the essence of the real thing, it would not only be cheaper but much more convenient and flexible to own. I just happen to have a real Dyna-mite unit here in my studio, on loan from Glenn, so I thought I’d do a quick comparison between the plug-in version and the real thing. This is not a very scientific endeavor so please excuse any oversights.
CONTROLS / INTERFACE:
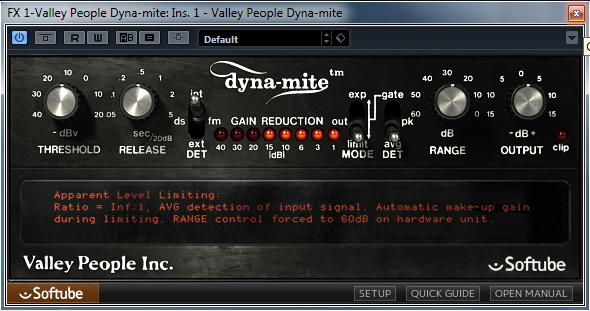
First and foremost, the Softube Valley People Dyna-mite plug-in looks like the real deal, with the same controls in the same order, the same LED gain reduction metering, and even the same fonts. It is a prime example of the modern philosophy of skeuomorphism in digital design but in this case it makes perfect sense. Softube intends the plug-in to faithfully capture the real analog unit. Making the plug look the same is the first step.
The first control on the left is for the THRESHOLD which determines the signal level at which the compressor is engaged. Second is a knob for RELEASE which controls how quickly the compressor returns to normal (no compression). The next control DET, the detection circuit, is switchable between INT (internal), DS FM (essentially de-essing), and EXT (external). Next is the 8 LED meter followed by the MODE switch. The three modes are EXP (expansion), OUT (bypass) and LIMIT (limiter). Next is yet another switch labeled DET, this time linked to the MODE and with three choices; AVG (average), PK (peak), and GATE. Essentially this changes the ratio of the compression. Finally a RANGE knob and OUTPUT knob finish out the controls.
This is the dual unit I’ll be using for this test. Pay no attention to the LA610 beneath.
It is beyond the scope of this review to describe how all these functions work in conjunction with one another. The original Dyna-mite manual is available at the Softube website if you want to dig in to the technical side of things. In short, you can use the Dyna-mite not only as a compressor but also a gate, fast attack limiter, slow attack limiter, expander, or de-esser, making it quite versatile. The plug-in purports to accurately model all of this, including a “Weird Limiting” mode which is an unintended feature of the original device. From the review on the Sonicscoop site:
If the detector mode is set to LIMIT and the detector type is set to GATE, you end up with a scenario in which any signal above a certain threshold is hard limited. The range and release controls really come into play here. If the range is set too high, you end up hearing nothing except clicking, presumably the attack time of the limiter as it is engaged. Similarly, if the release time is set too long, you also end up with silence, as the compression takes to much time to be released. However, if your range is set to around 5-6 dB, and the release time around a few ms, you’ll hear some interesting pumping and modulation effects on your source.
Sounds like fun! The manual from Softube goes into great detail about how to use the Dyna-mite and is worth a read through upon purchasing.
COMPARISON:
Ok, so now to the nitty gritty. How accurate is Softube’s emulation? Let’s do some examples. I’ll use the Dyna-mite as a parallel drum bus compressor, since that’s most likely what I’ll be using it for in most circumstances.
Side note: What is parallel compression? It is simply mixing some dry, uncompressed signal in with the compressed signal. For background and examples, this Sound On Sound article is very good:
Here is a drum sample from my upcoming progressive rock project. The drummer is my friend Kevin DePree playing his DrumCraft acrylic kit. This is a dry sample with no bus compression although there is EQ on the individual mics and some light compression on the kick and snare.
Next, let’s use the Softube Valley People Dyna-mite as a parallel bus compressor. Notice I am not matching levels with the dry audio as this is not about how the compressor colors the sound compared to the dry but rather whether the plug-in sounds like the real deal. I will level-match the audio from the plug-in and the real unit.
The settings on the plug-in are fairly simple. Threshold and Release are both at 12 o’clock, the detection circuit is set to INT, the MODE and DET switches are set to LIMIT and AVG and the range is also at 12 o’clock. It has a nice, full, and punchy sound. I’m compressing the signal quite hard, reaching about 20 db of gain reduction on the heavy peaks. But when mixed back in with the dry signal, it adds both body and girth to the sound. That’s what parallel compression is about!
Softube Valley People Dyna-mite settings for the above sample.
Now let’s see how the real Dyna-mite sounds with similar settings. This was a bit tricky because the unit I have needs to be calibrated. One side requires much more make up gain than the other. This may affect the sound of the actual compression and skew the comparison.
And finally, here are both the plug-in and the real unit together, swapped every 10 seconds. The first 10 seconds is the real unit, the next 10 seconds is the plug-in, the next 10 the real unit again, etc.
CONCLUSION:
To my ears, the real unit has very slight upper end sparkle and also a “live” quality to the midrange, especially evident on the snare. I’m talking a minuscule amount here, nothing huge. Of course, this could be due to a couple of things; I had to manually align the audio from real unit to the original un-compressed track and while I did it to what appeared to me to be sample accuracy, it could be ever so slightly off which would induce tiny phase issues and thus alter some frequencies. It could also be due to the extra analog to digital and digital to analog conversion required in order to insert the real unit into my system. It could be due to the issue of the output of the first channel on the real unit needing calibration. And finally this particular Valley People unit could be overall a bit out of spec. It did come used off eBay afterall and is over 30 years old.
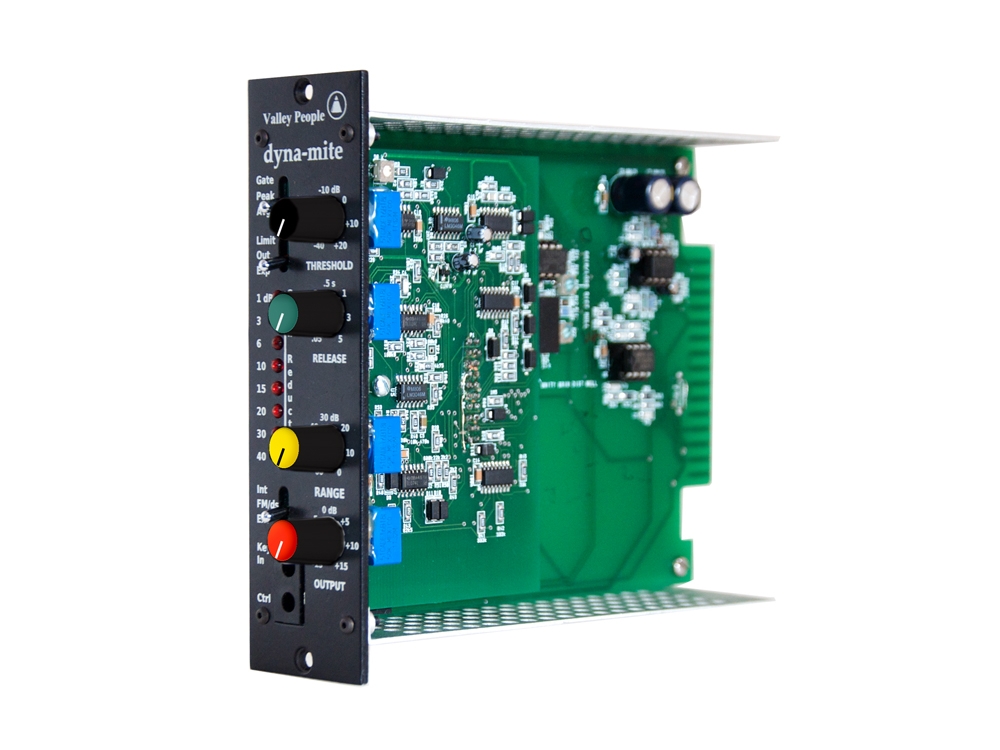
Valley People was bought by the PMI Group in 2007 and is now making 500 series versions of their most popular designs. A 500 series Dyna-mite is available but at a cost of $599.
Regardless, the simulation and the real deal are extremely close. The character of the compression is dead on. That little bit of extra sparkle could be added with some EQ. Or perhaps the track doesn’t need it? The flexibility of the plug-in certainly adds to its appeal. It doesn’t use much CPU and can be used as a gate, de-esser, and limiter as well as a compressor. Not to mention you can use it on as many tracks as your computer can handle.
I’ve experimented with the Softube Valley People Dyna-mite on vocals both as compressor and de-esser. As a de-esser it does a good job with that vintage vibe. As a compressor on vocals, not so much. It is better on percussive material, guitars, and keys (especially for that extreme in-your-face compressed piano sound). I think it’s strong point is as a parallel bus compressor on drums. It really shines in that role and is worth the money for that purpose alone. And this is true of both the real unit and the plug-in. Kudos to Softube for the authentic emulation. It emulates with near-perfect accuracy the Dyna-mite’s strengths, character, oddities, and weaknesses.